Table of Contents
Boat work philosophy
My initial work on the boat was fixing things that prevented us sailing. The exclusive goal was to enable sailing. An unintended side effect of this is that the work doesn't look very nice. It's functional, but it's obviously not the work of a professional. Initially this didn't bother me too much but then I made a classic error: I started thinking about it.
We're the current owner of this boat. At some point we'll sell the boat. I would like the next owner to have a good time with the boat and feel good about owning it. I fix a lot of things around our house and I often discover cut corners, or poor material choices, or temporary fixes that were never revisited, and I think the person who did the work was a dufus. This is perhaps unfair, but I'd prefer that nobody looks at something I did and thinks I'm a dufus. We're only the custodian of this boat/house/planet, and it reflects well on us to do a good job of looking after it.
Hinged mast step
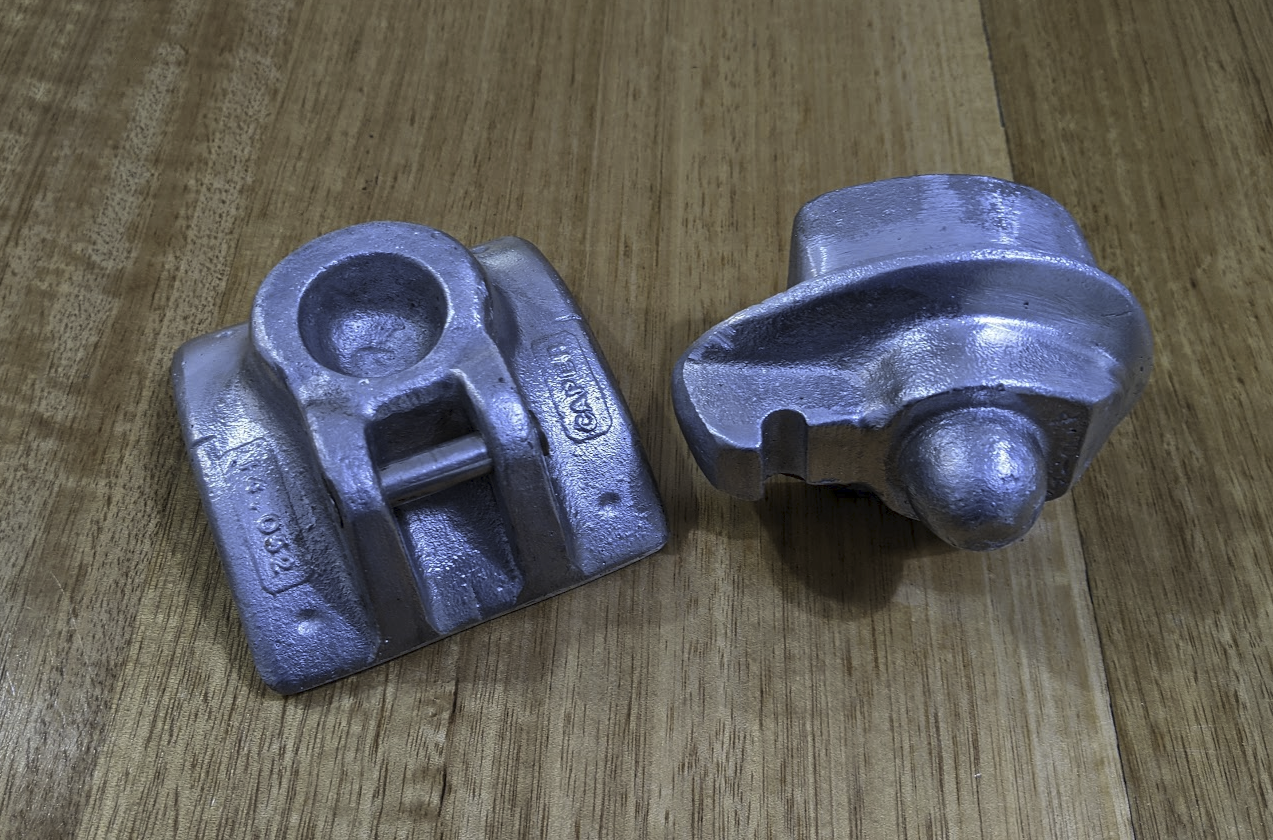
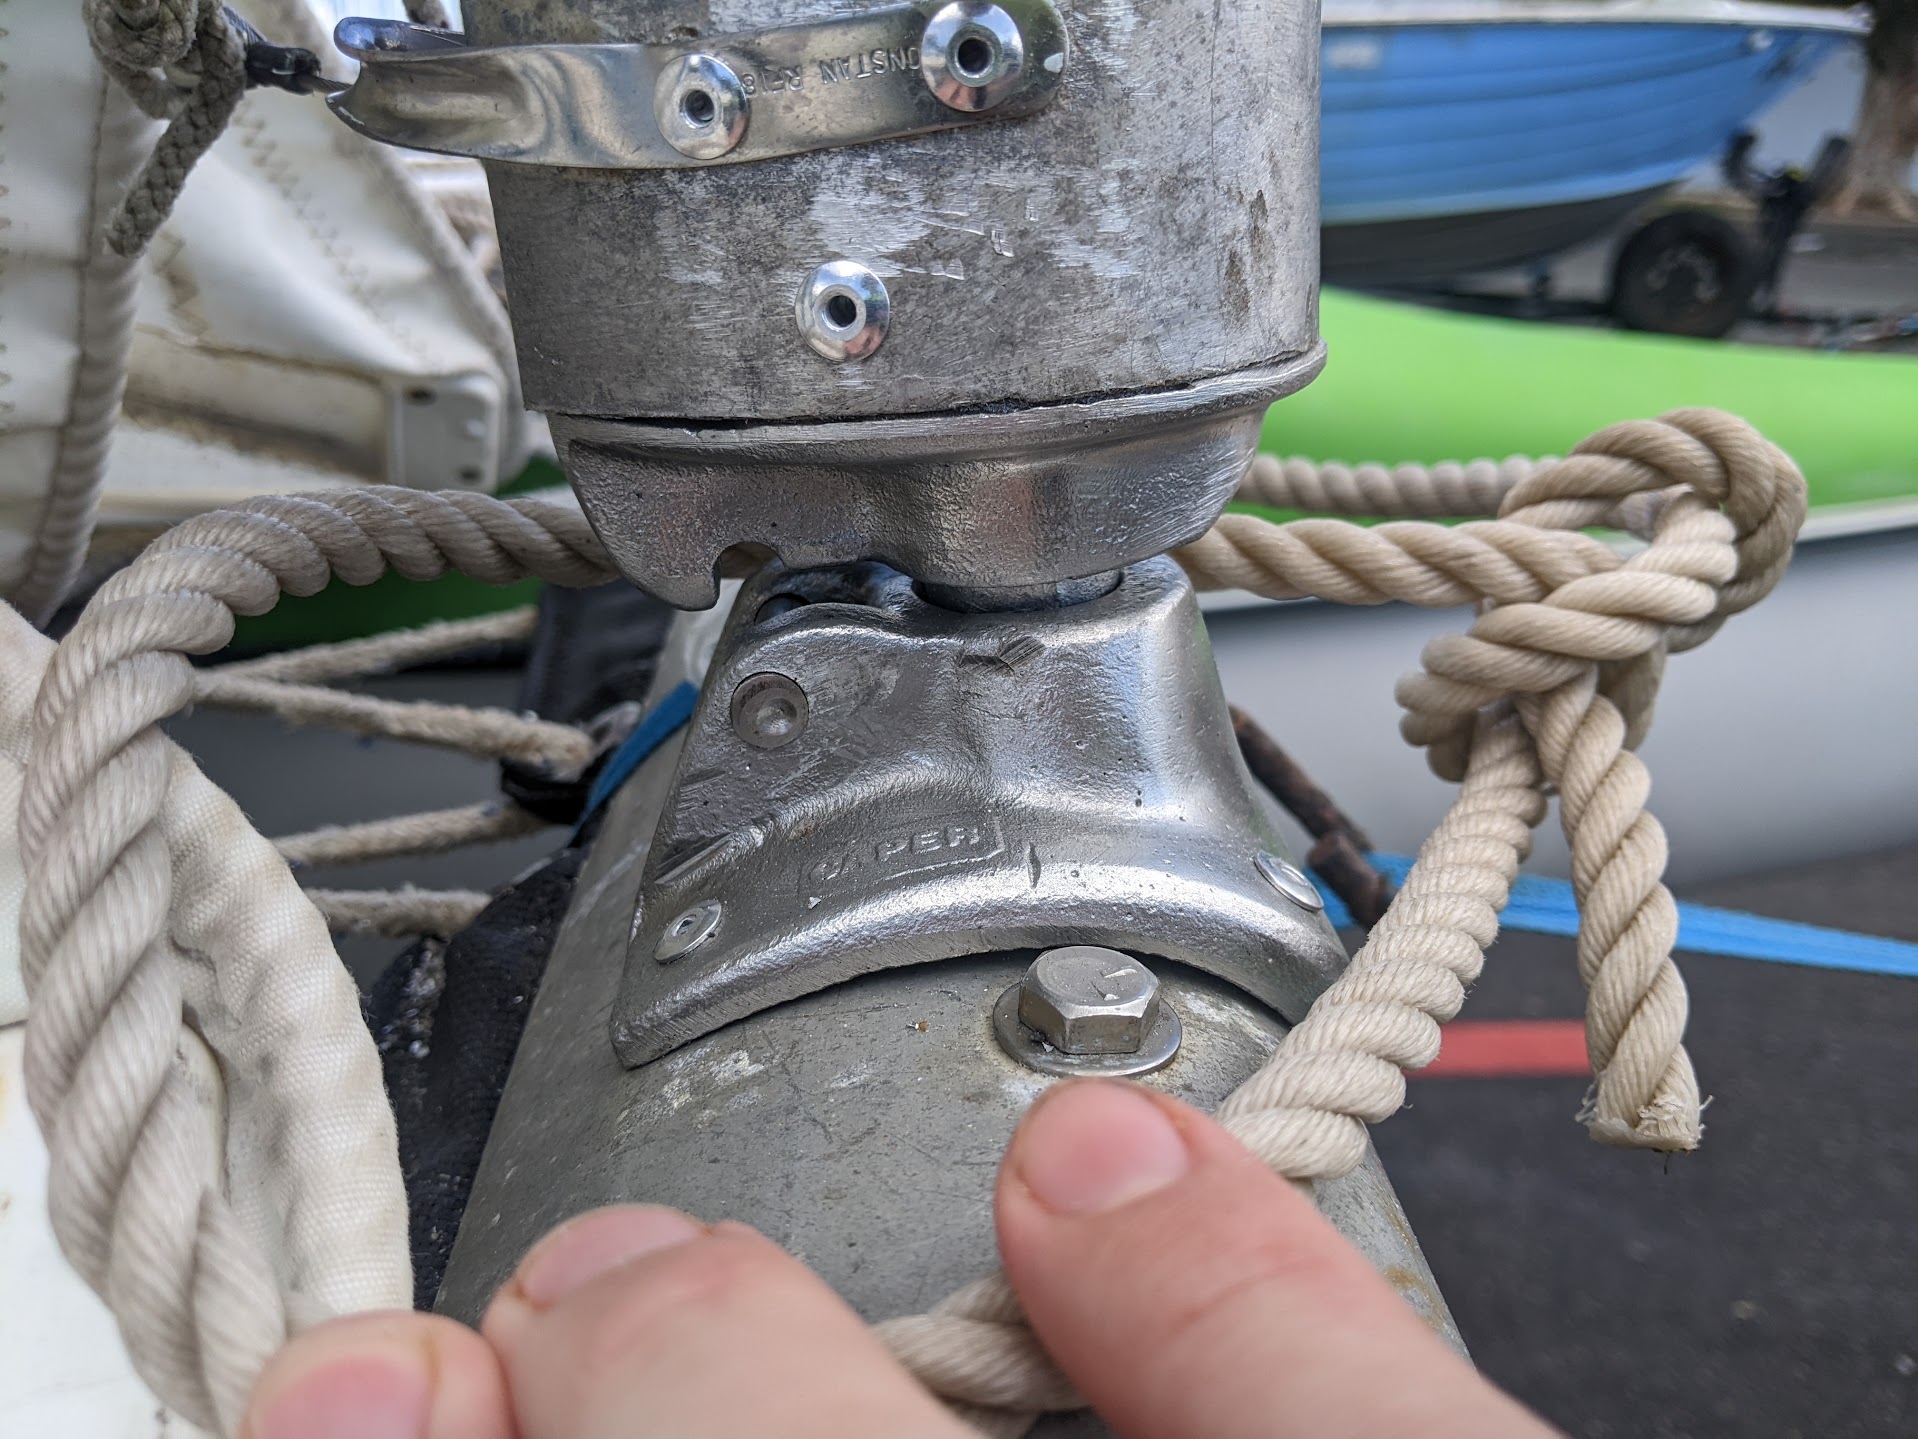
You may remember the other caper cat we saw at the boat ramp. It had a different way of holding the mast onto the boat at the base. Instead of the pin and socket system our boat has, it has an open hinge and a kind of loose ball joint. This means the mast can be hooked into the hinge when laying flat and then tilted upright into the socket, rather than having to lift the mast straight up and into the socket. Still nursing some cracked ribs from earlier mast-based adventures I started looking for where I might buy one of these.
One of the tragedies of the modern era is that internet forums have died. Their users absorbed into a variety of centralised services owned by one of the four big companies. There are exceptions though, and two of those are catsailor.net and Trailer Sailer Place. These seem to be mostly populated by crusty boat-owning men with questionable politics. It was in one of these forums I learned something interesting about Calypso, the company that made our boat. When they shut down they passed the torch to LR Sails. LR Sails now provides bits and pieces for caper cats, including the hinged mast step kit. AUD$230 later my spending spreadsheet had another row and I had two chunks of cast aluminium to somehow attach to the boat.
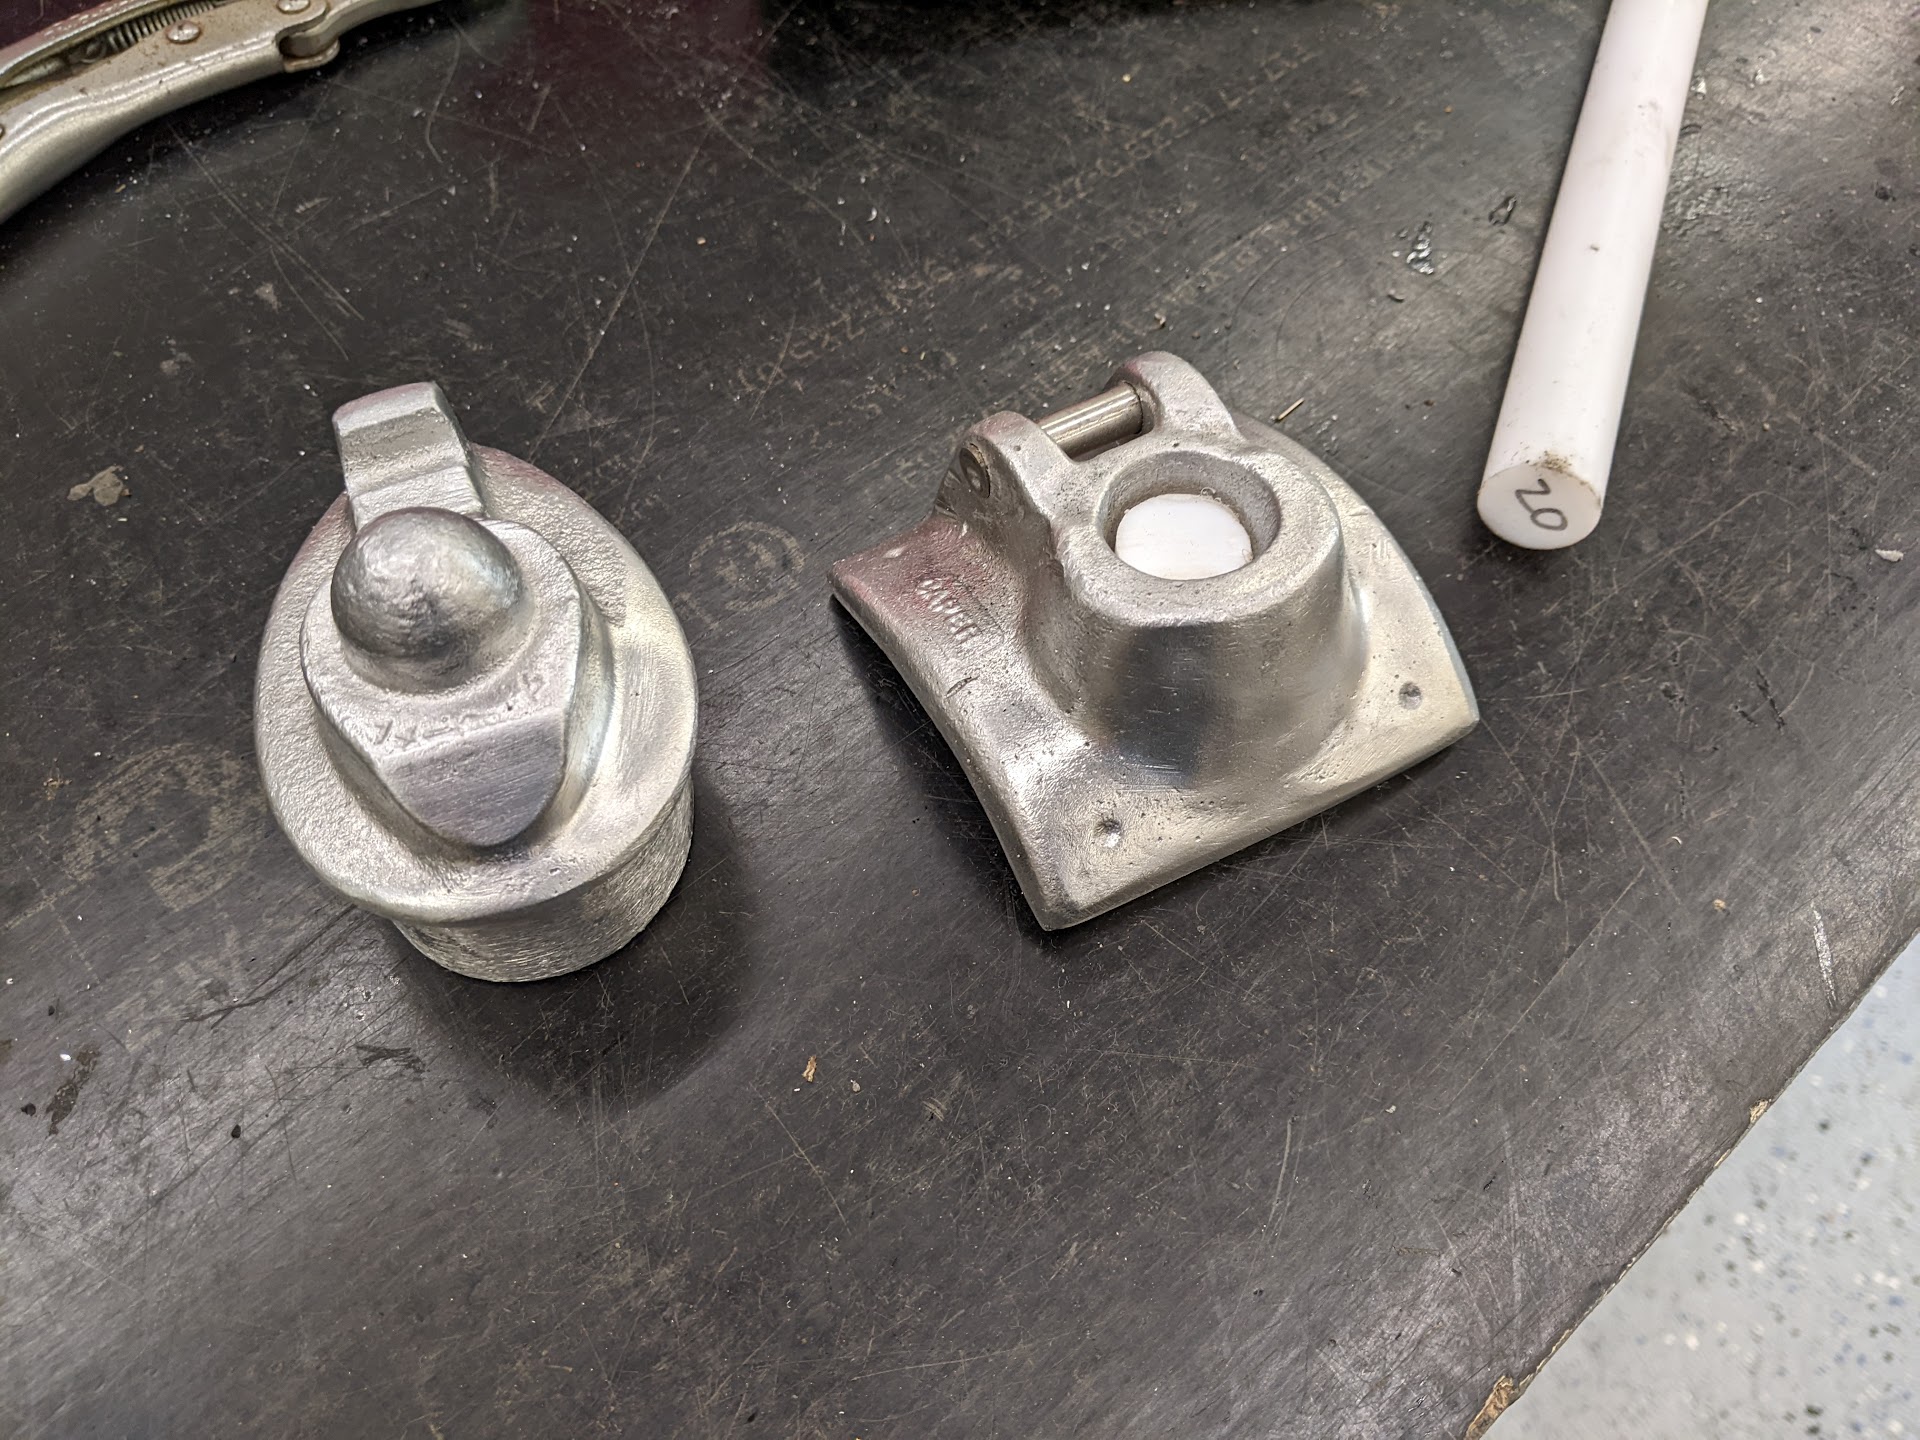
I learned from forums and youtube that there should be something inside the joint to ensure the mast can rotate freely. The aforementioned crusty men recommended a two cent coin. Nipping back to 1996 to pick up a handful of change was out of the question thanks to a broken time machine, so I cut a disc of PTFE off the end of a rod I had leftover from another project. That should do nicely.
The kit didn't come with any instructions, so I had to intuit how it needed to go onto the boat. Unfortunately I didn't take a photo of the underside of the socket piece before I installed it. This would've shown a substantial divot in the concave curved surface that will face down when it's installed on the boat. This divot was positioned exactly under the socket on the other side. More on that later.
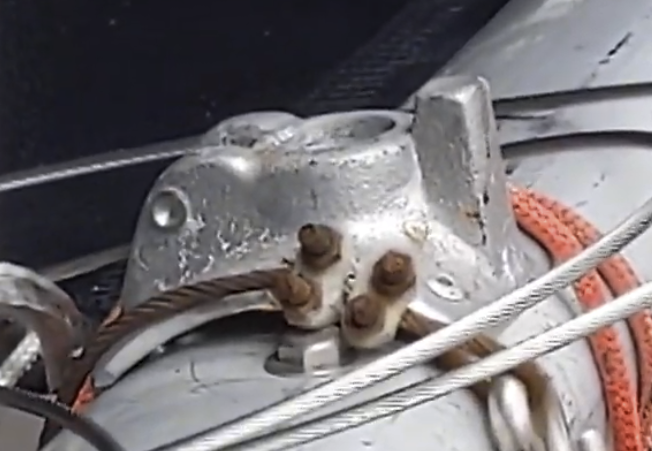
The curve perfectly matched the extrusion on which the mast sits. Unfortunately this would place the socket itself on a substantial forward-leaning angle. The mast couldn't stand upright and rotate as is needed without interference from the hinge mechanism. I went back and watched the video I took of the other caper cat, zooming and enhancing as required.
Their step isn't sitting flush on the extrusion. Hmm. Regardless, I needed to remove the old mast step. This took quite a lot of violence. A few days prior, just after I ordered the new kit, I doused the old step in WD40 to give myself a fighting chance of taking it off when the time came. Actually getting the mongrel off involved an impact driver, a socket set, a pair of multigrips, a pair of vice grips and a blowtorch.
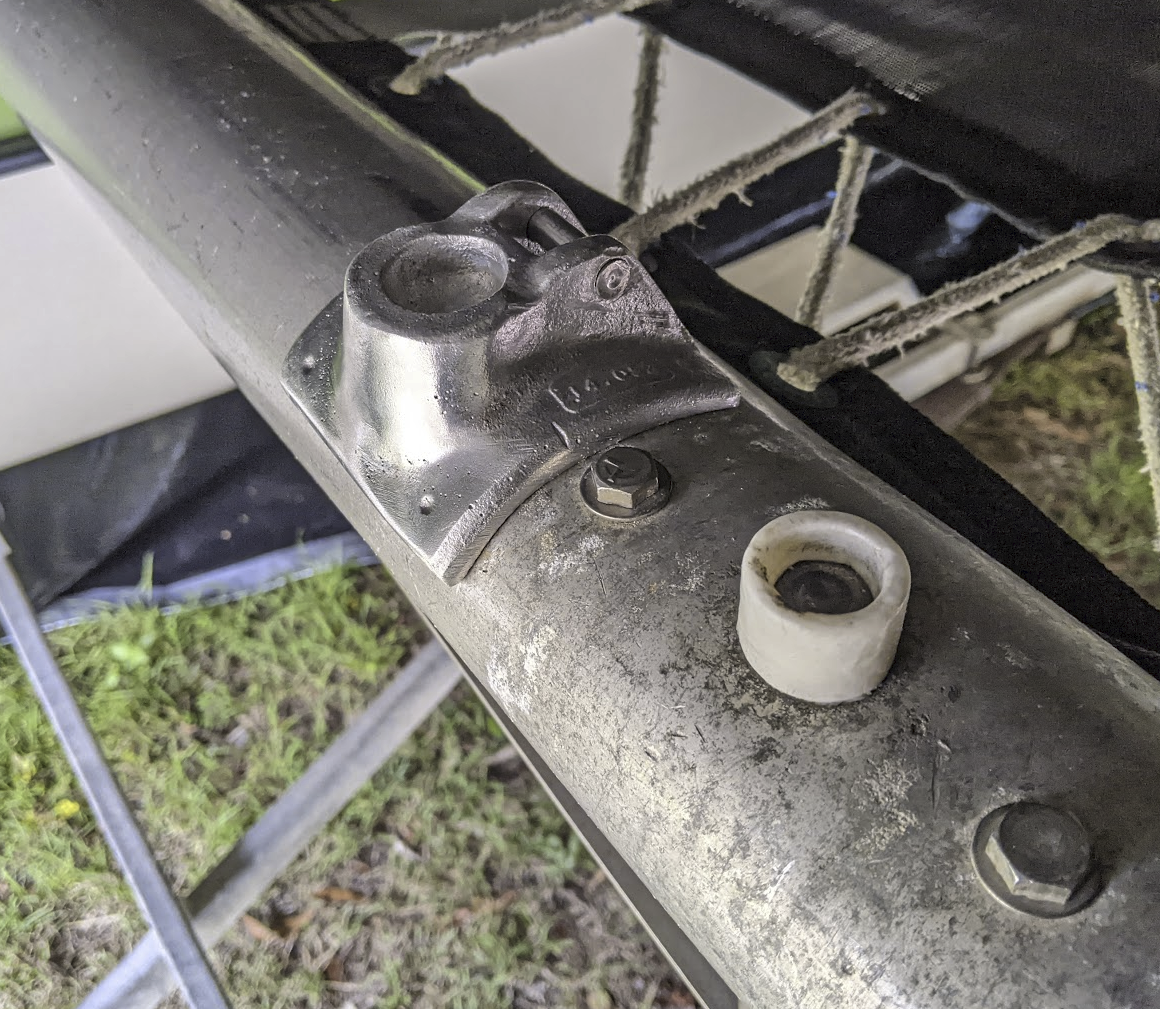
Careful Application of Violence
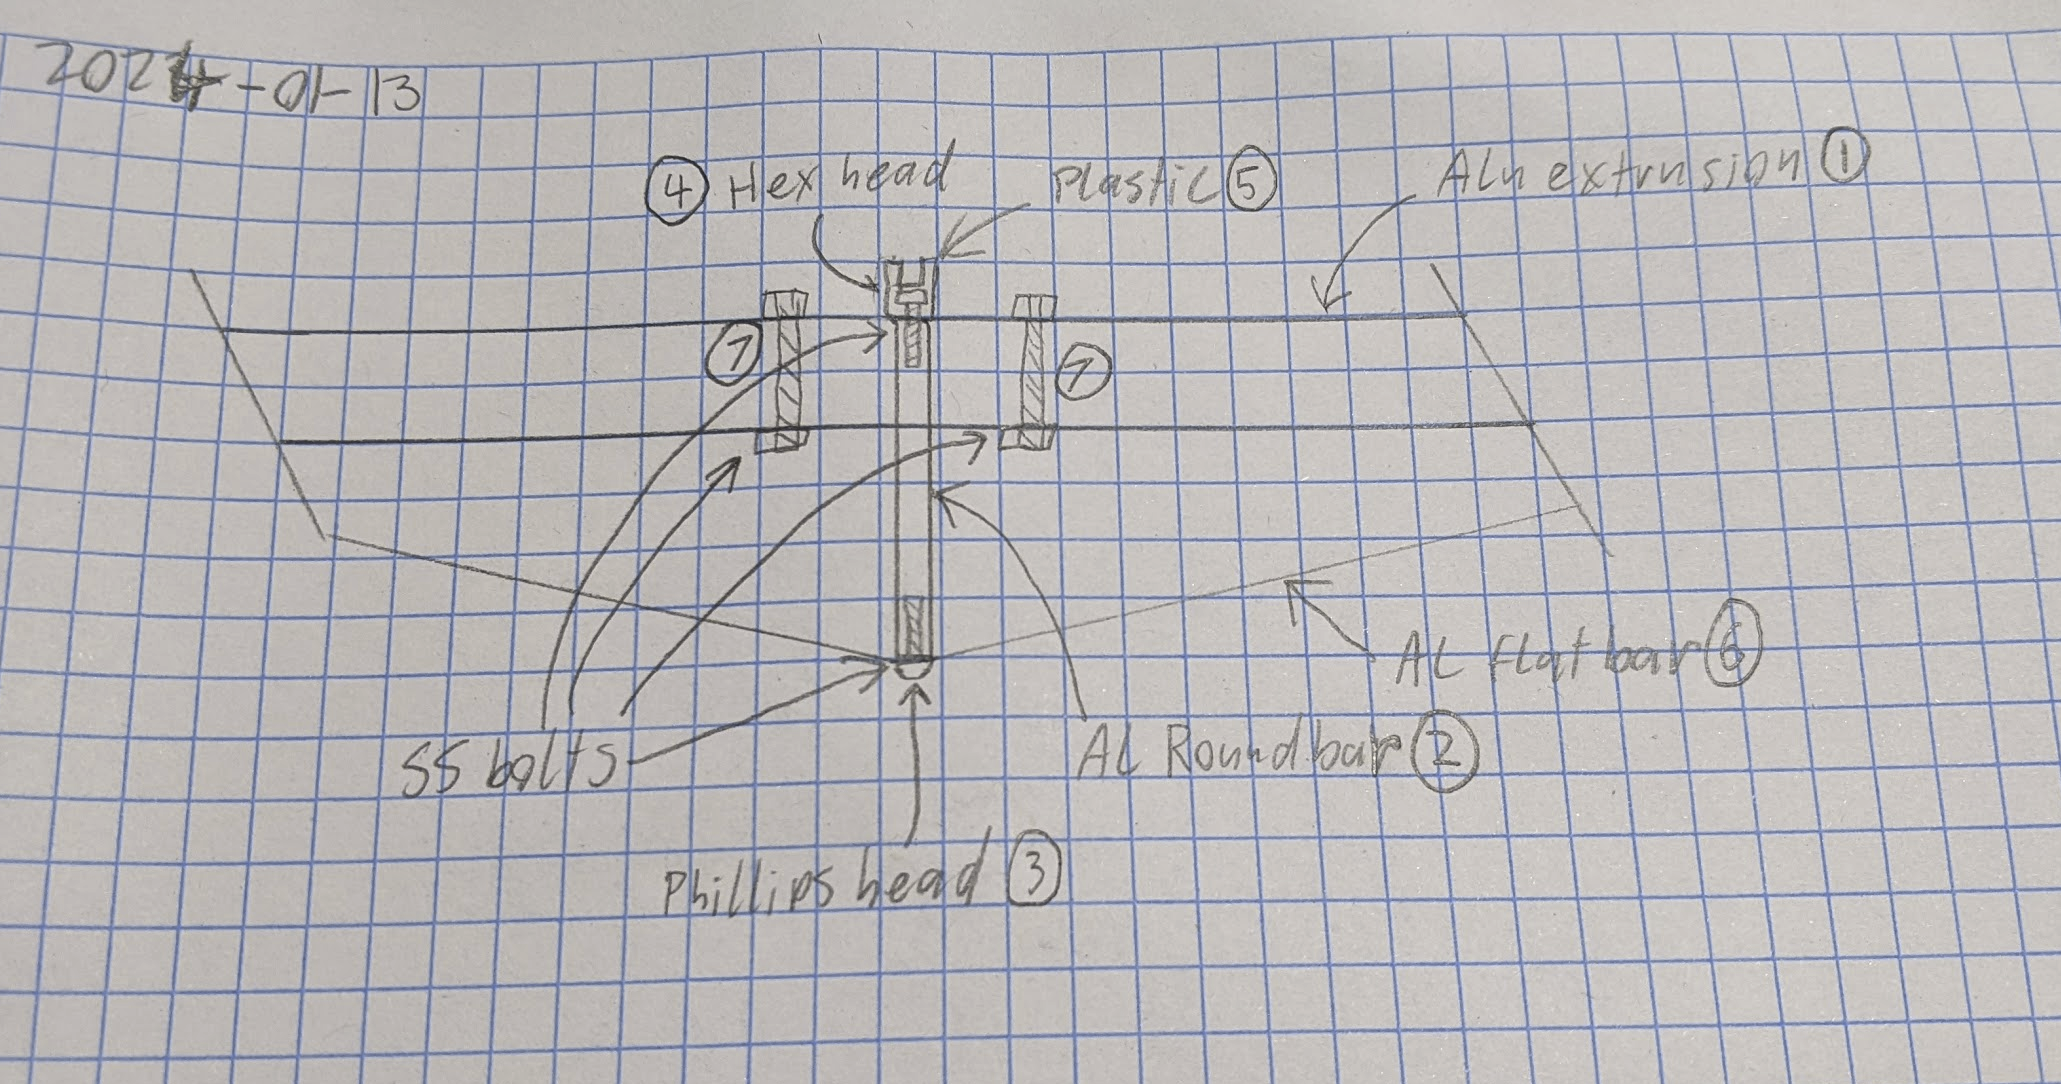
I tackled the bottom phillips head stainless bolt ③ first. It wasn't moving even slightly after heavy application of an impact driver. I didn't want to shear it off, so I heated up the aluminium round bar ② with the blow torch to relax the joint. It eventually came loose after many ugga duggas. I cracked away the plastic socket ⑤ with the multigrips to expose the head of the top bolt ④ and got a socket onto it. It was also stuck, and required even more heating, but it eventually relented. This let me remove the round bar ② and clean out the threaded holes in either end.
The purpose of this bar is to transmit the downward force of the mast into tension in the aluminium flat bar ⑥ straps that extend diagonally out to the ends of the main extrusion ①. This adds strength and rigidity, helping to prevent the main extrusion folding downwards in the middle and causing a bad day. The extrusion also has two other stainless bolts ⑦ either side of the mast step. As far as I can tell they are just there for moral support. They might pass through another cast piece inside the extrusion? I can't tell, and I didn't need to play with them.
After significant thought, motivated by wanting to go sailing the next day, I decided the best course of action would be to use the old mast step bolt as a locating guide and mechanical support for the new casting. I assumed the divot in the underside of the casting was there for this purpose. The top bolt ④ previously had 2-3mm of plastic socket ⑤ between it and the extrusion ①, so the bolt would need to be trimmed down to clamp the extrusion snugly against the round bar ②. This would serve to keep the bar upright and true. I reinstalled the bar and bolts. Using the divot as a guide I traced, drilled and riveted the step down to the extrusion over the top of the trimmed top bolt. Due to the mismatch in angles there is a gap between the step and the extrusion, but I'm pretty sure it is now where it should be, mechanically and geometrically.
Further Violence
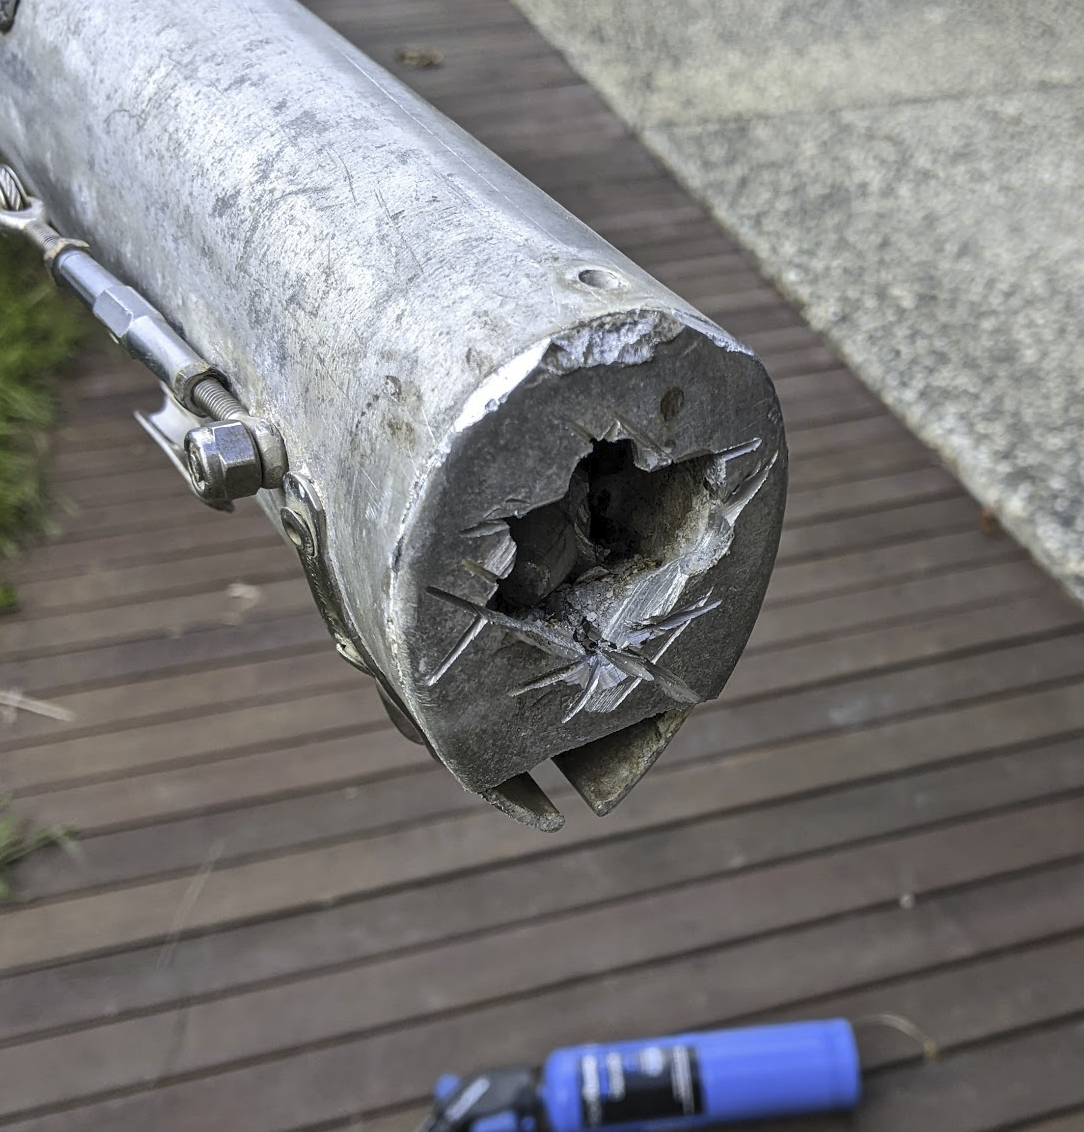
Now it was time to work on the base of the mast. Getting the old casting off was an absolute turbo-mongrel of a job. I'd hoped I could just drill out the single rivet holding it on and tap it out with a sacrificial chisel on an edge of the casting. Absolutely not. It would not move even a micron. I heated up the mast with the blowtorch to try to loosen the joint – not a sausage. It was stuck in there solidly.
I drilled some holes in it to loosen it up. I broke one drill bit and dulled another on some hidden stainless before giving up. I resorted to a cutoff blade in an angle grinder to mangle the end, being careful not to nick the mast itself. This was cathartic but didn't get me any closer to taking it off. The breakthrough was using a metal blade in a jigsaw to cut through the casting up to the extrusion. This broke the circumference of the casting and gave me a fighting chance of releasing it from the mast.
Once I got the old one out it was a simple matter of tidying up the cruft inside the mast, tapping in the new one and riveting it in place. Job done! The initial fit wasn't as snug as I'd hoped, but it was rigidly in place after 3 5mm pop rivets. This joint is only ever in compression, so it's not going anywhere.
I had hoped this new step would let me raise the mast solo. After a few hazardous attempts, the creation of a very long steel fork apparatus, and much muttering about triangles I deferred that goal to another day and enlisted Michelle's help. Together we easily raised the mast in one smooth controlled operation. A definite improvement over the old system.
Tomorrow: Moreton Bay!

