Table of Contents
Boat work philosophy
My initial work on the boat was fixing things that prevented us sailing. The exclusive goal was to enable sailing. An unintended side effect of this is that the work doesn't look very nice. It's functional, but it's obviously not the work of a professional. Initially this didn't bother me too much but then I made a classic error: I started thinking about it.
We're the current owner of this boat. At some point we'll sell the boat. I would like the next owner to have a good time with the boat and feel good about owning it. I fix a lot of things around our house and I often discover cut corners, or poor material choices, or temporary fixes that were never revisited, and I think the person who did the work was a dufus. This is perhaps unfair, but I'd prefer that nobody looks at something I did and thinks I'm a dufus. We're only the custodian of this boat/house/planet, and it reflects well on us to do a good job of looking after it.
Hinged mast step
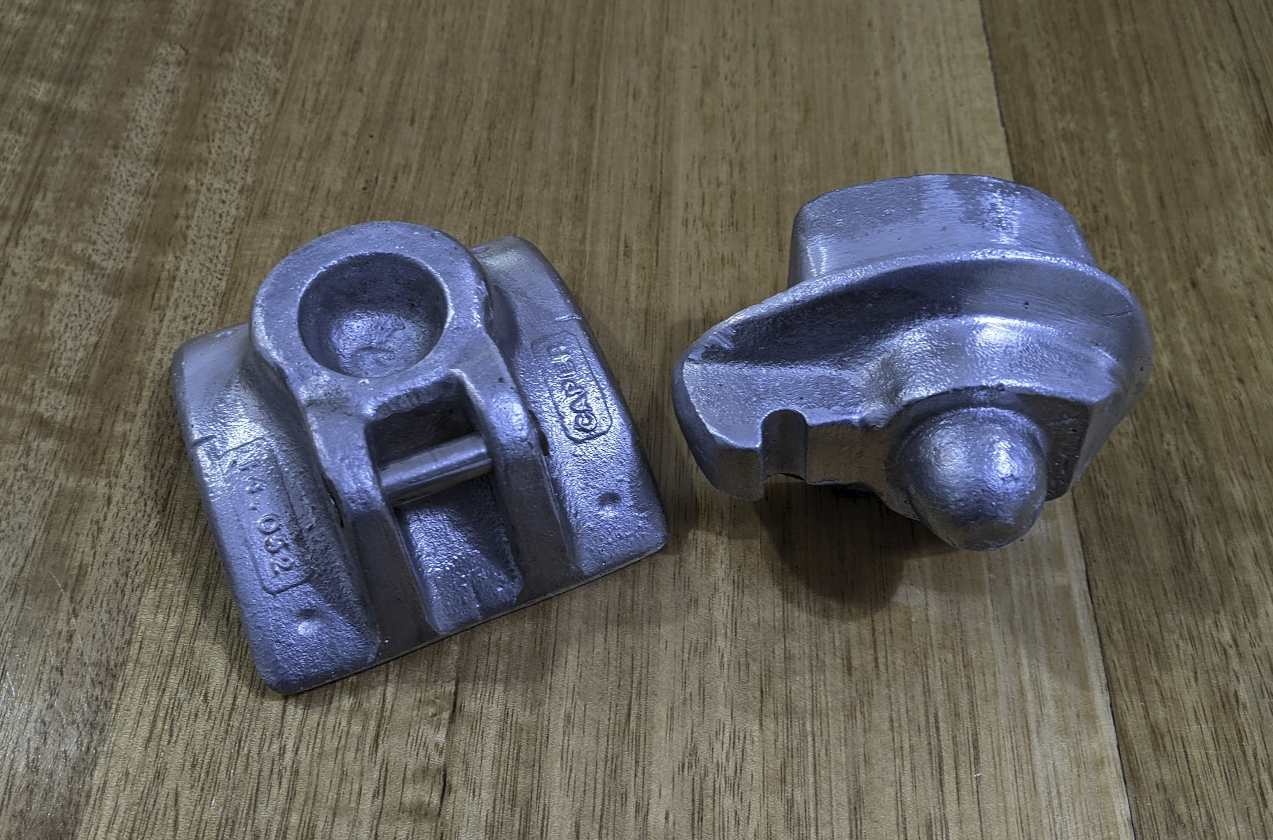
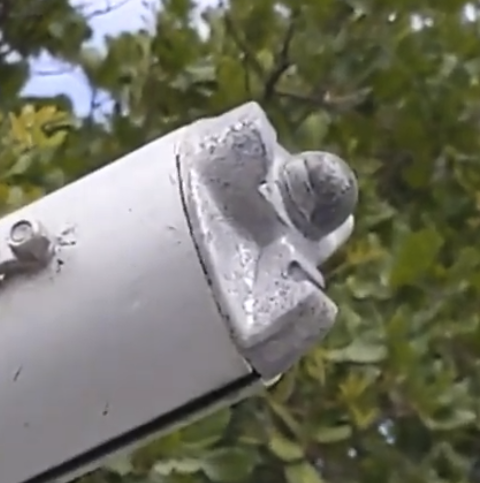
You may remember the other caper cat we saw at the boat ramp. It had a different way of holding the mast onto the boat at the base. Instead of the pin and socket system our boat has, it has an open hinge and a kind of loose ball joint. This means the mast can be hooked into the hinge when laying flat and then tilted upright into the socket, rather than having to lift the mast straight up and into the socket. Still nursing some cracked ribs from earlier mast-based adventures I started looking for where I might buy one of these.
One of the tragedies of the modern era is that internet forums have died. Their users absorbed into a variety of centralised services owned by one of the four big companies. There are exceptions though, and two of those are catsailor.net and Trailer Sailer Place. These seem to be mostly populated by crusty boat-owning men with questionable politics. It was in one of these forums I learned something interesting about Calypso, the company that made our boat. When they shut down they passed the torch to LR Sails. LR Sails now provides bits and pieces for caper cats, including the hinged mast step kit. AUD$230 later my spending spreadsheet had another row and I had two chunks of cast aluminium to somehow attach to the boat.
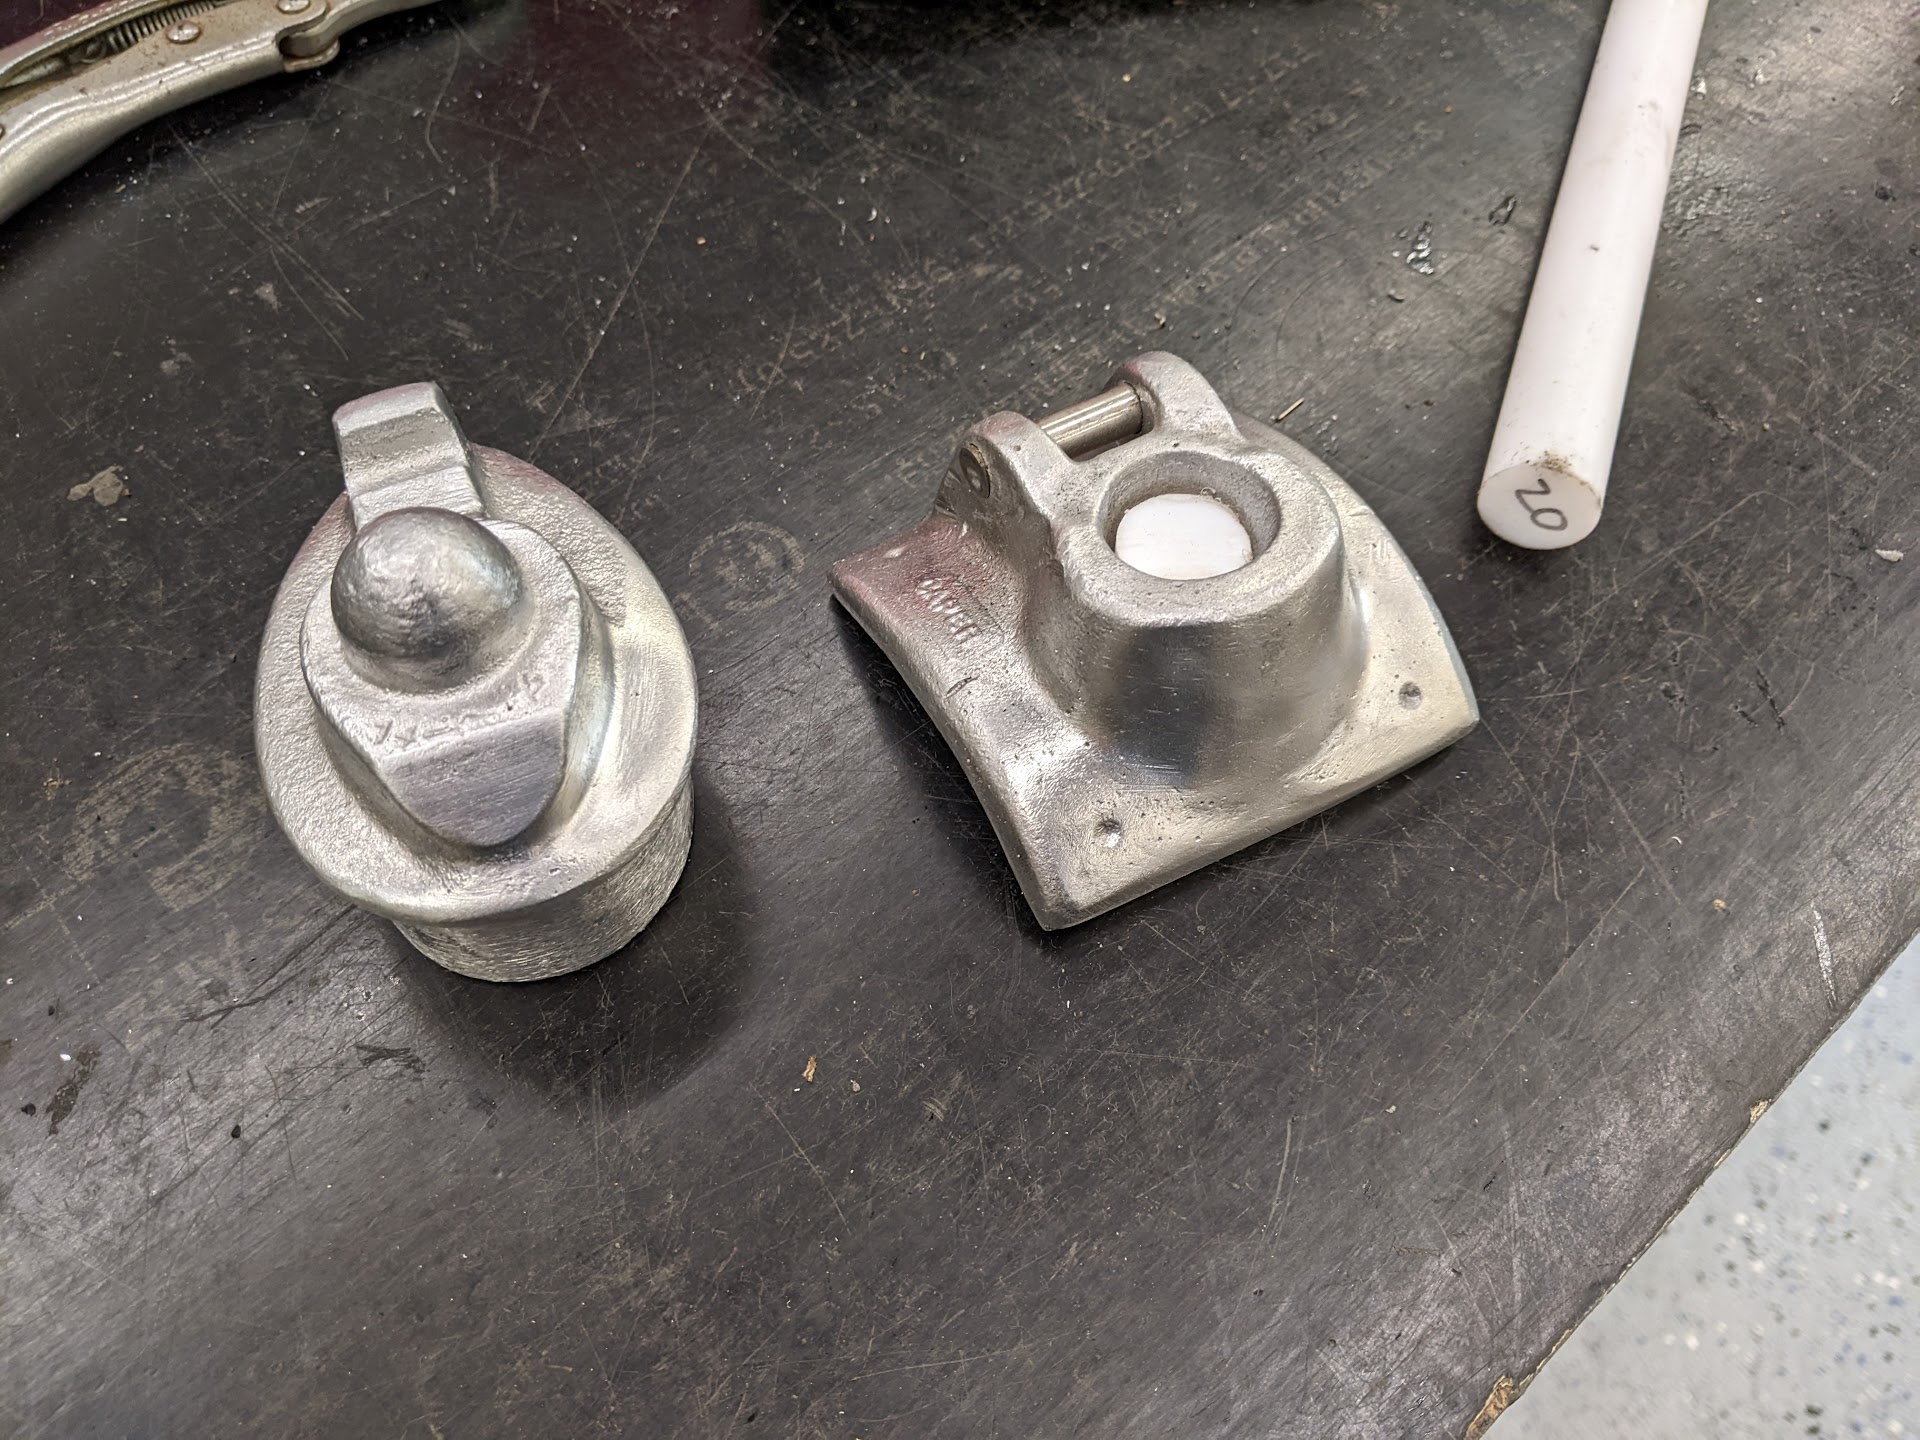
I learned from forums and youtube that there should be something inside the joint to ensure the mast can rotate freely. The aforementioned crusty men recommended a two cent coin. Nipping back to 1996 to pick up a handful of change was out of the question thanks to a broken time machine, so I cut a disc of PTFE off the end of a rod I had leftover from another project. That should do nicely.
The kit didn't come with any instructions, so I had to intuit how it needed to go onto the boat. Unfortunately I didn't take a photo of the underside of the socket piece before I installed it. This would've shown a substantial divot in the concave curved surface that will face down when it's installed on the boat. This divot was positioned exactly under the socket on the other side. More on that later.
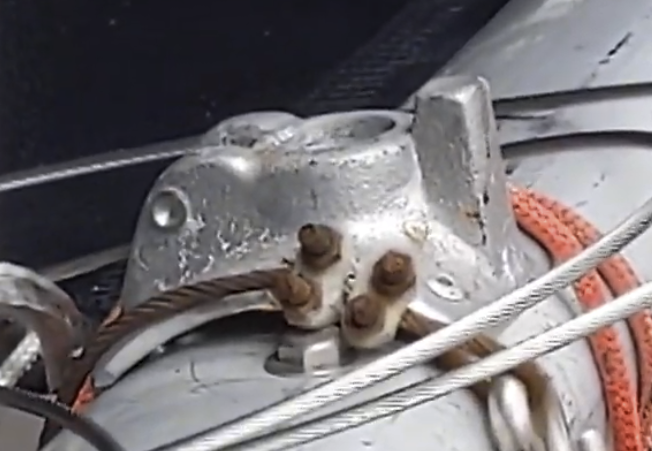
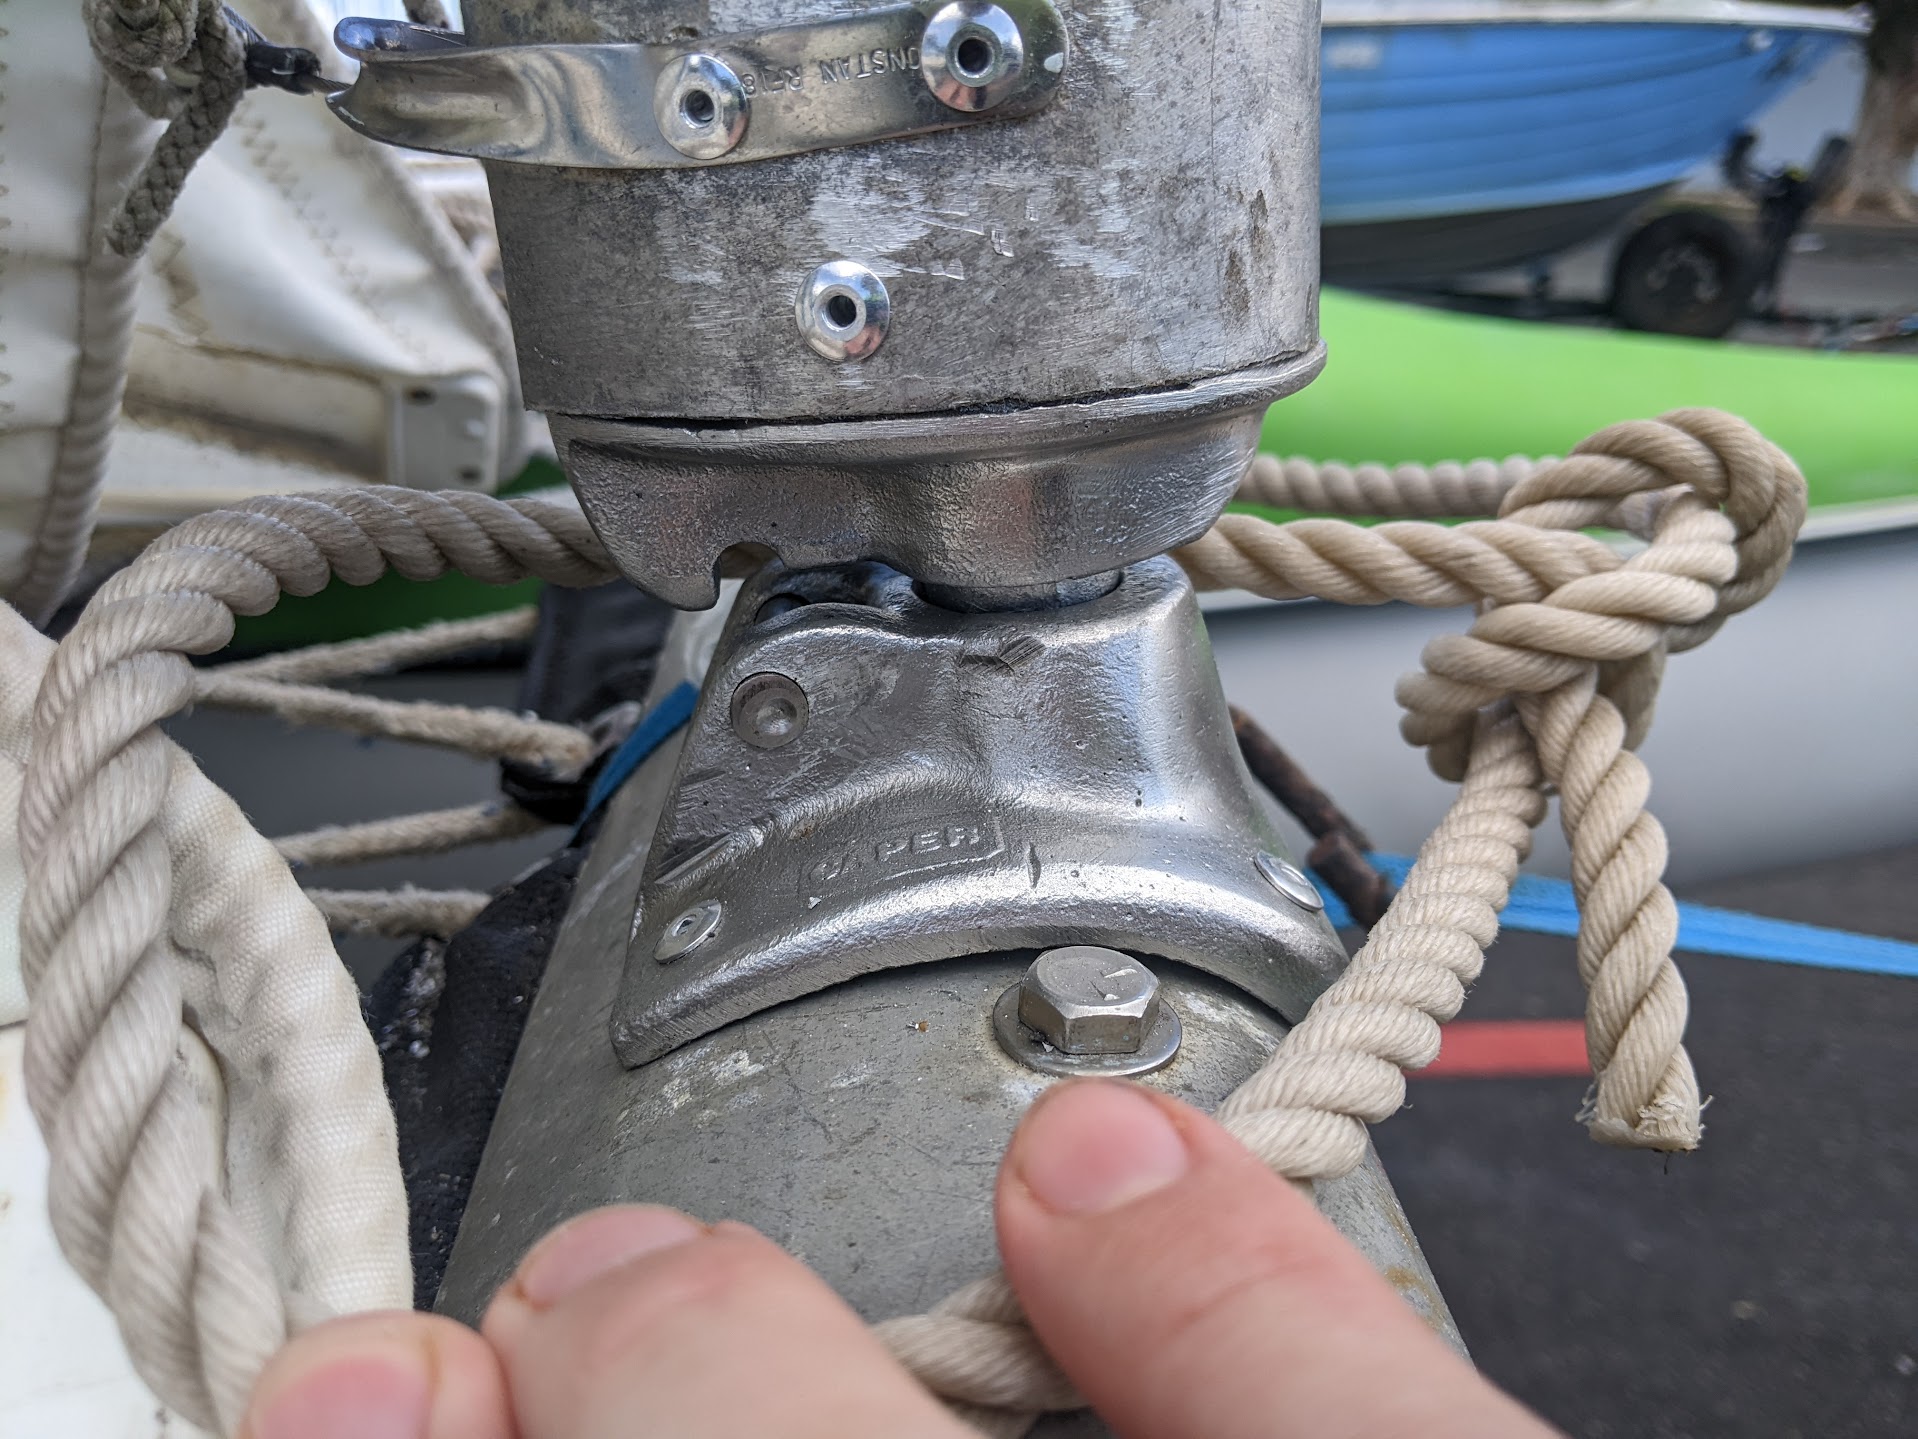
The curve perfectly matched the extrusion on which the mast sits. Unfortunately this would place the socket itself on a substantial forward-leaning angle. The mast couldn't stand upright and rotate as is needed without interference from the hinge mechanism. I went back and watched the video I took of the other caper cat, zooming and enhancing as required.
Their step isn't sitting flush on the extrusion. Hmm. Regardless, I needed to remove the old mast step. This took quite a lot of violence. A few days prior, just after I ordered the new kit, I doused the old step in WD40 to give myself a fighting chance of taking it off when the time came. Actually getting the mongrel off involved an impact driver, a socket set, a pair of multigrips, a pair of vice grips and a blowtorch.
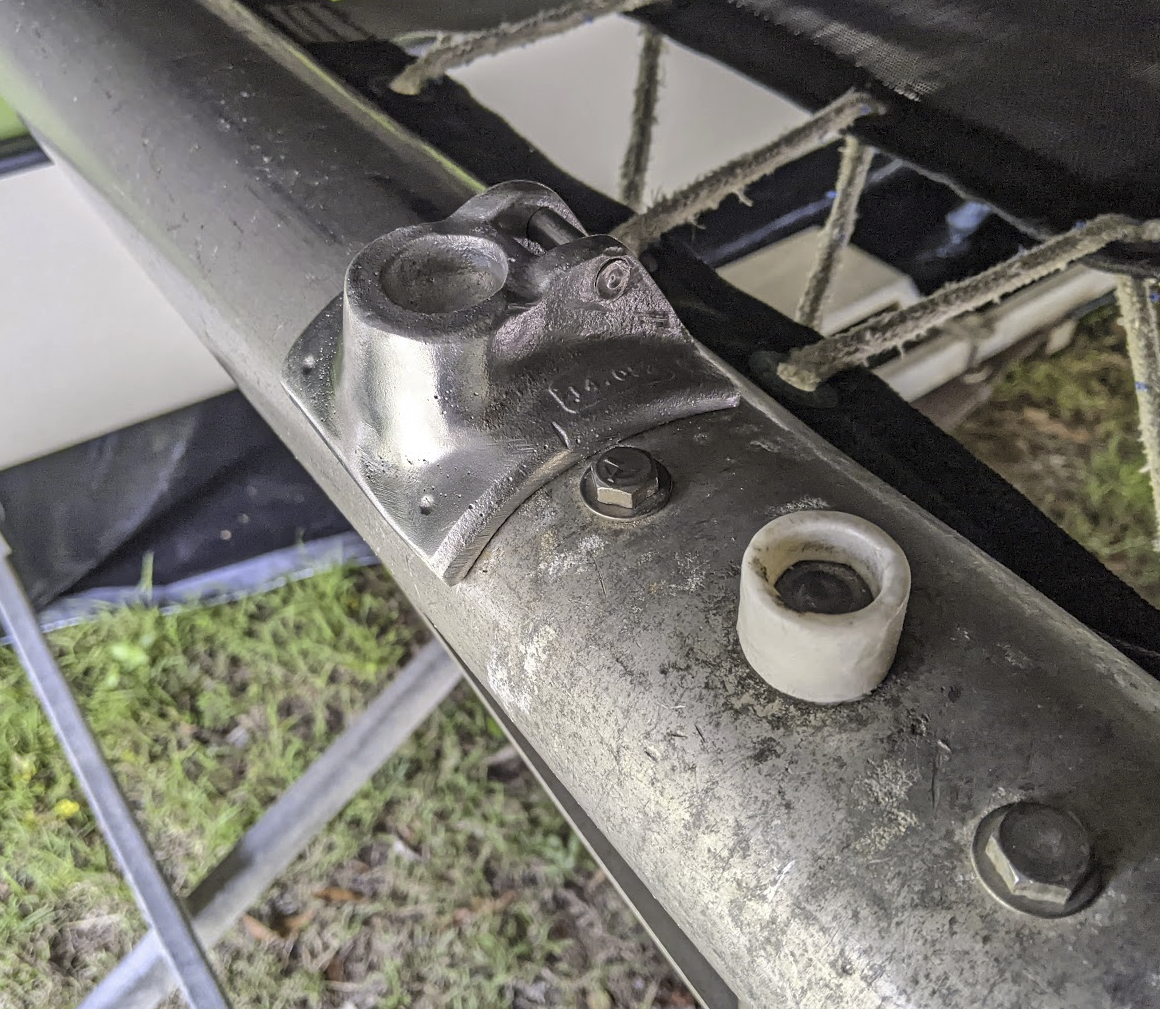
Careful Application of Violence
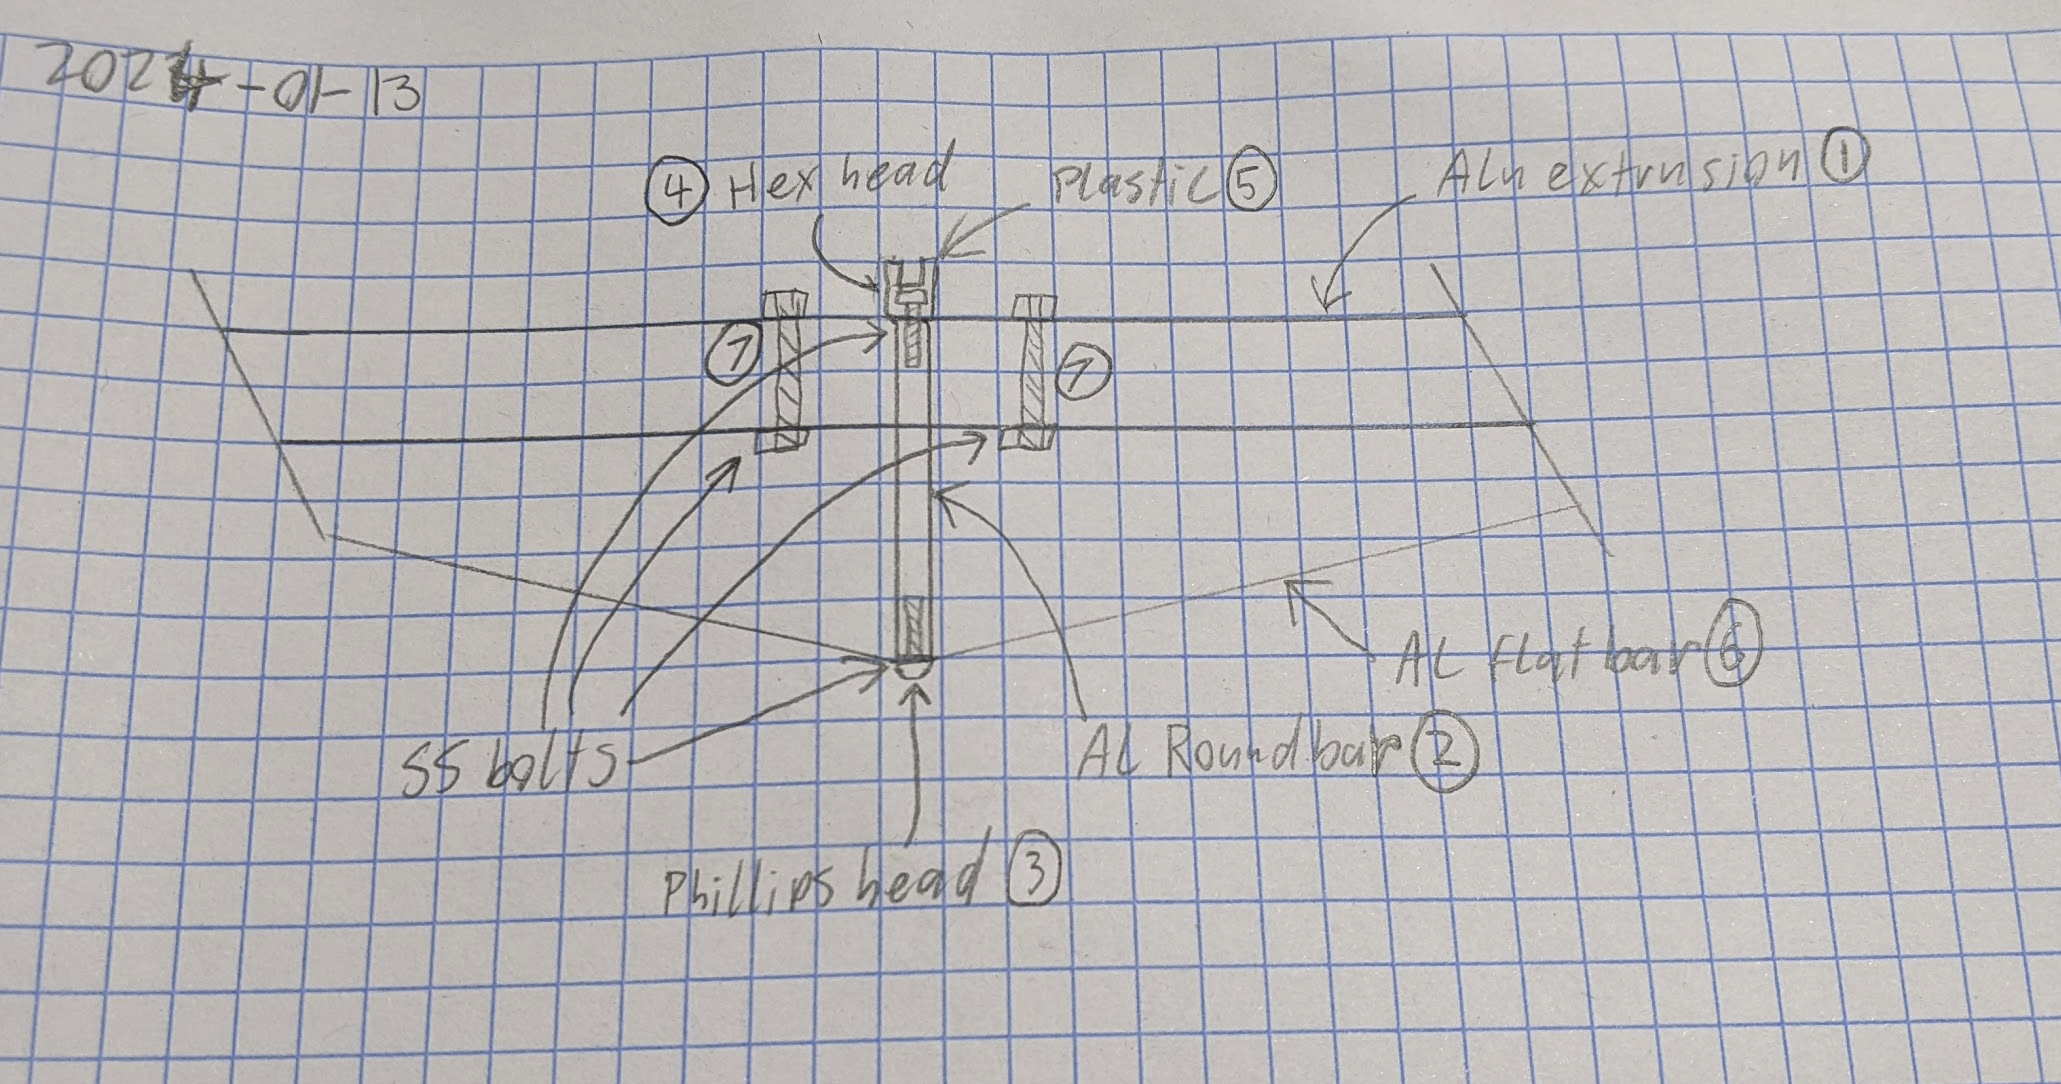
I tackled the bottom phillips head stainless bolt ③ first. It wasn't moving even slightly after heavy application of an impact driver. I didn't want to shear it off, so I heated up the aluminium round bar ② with the blow torch to relax the joint. It eventually came loose after many ugga duggas. I cracked away the plastic socket ⑤ with the multigrips to expose the head of the top bolt ④ and got a socket onto it. It was also stuck, and required even more heating, but it eventually relented. This let me remove the round bar ② and clean out the threaded holes in either end.
The purpose of this bar is to transmit the downward force of the mast into tension in the aluminium flat bar ⑥ straps that extend diagonally out to the ends of the main extrusion ①. This adds strength and rigidity, helping to prevent the main extrusion folding downwards in the middle and causing a bad day. The extrusion also has two other stainless bolts ⑦ either side of the mast step. As far as I can tell they are just there for moral support. They might pass through another cast piece inside the extrusion? I can't tell, and I didn't need to play with them.
After significant thought, motivated by wanting to go sailing the next day, I decided the best course of action would be to use the old mast step bolt as a locating guide and mechanical support for the new casting. I assumed the divot in the underside of the casting was there for this purpose. The top bolt ④ previously had 2-3mm of plastic socket ⑤ between it and the extrusion ①, so the bolt would need to be trimmed down to clamp the extrusion snugly against the round bar ②. This would serve to keep the bar upright and true. I reinstalled the bar and bolts. Using the divot as a guide I traced, drilled and riveted the step down to the extrusion over the top of the trimmed top bolt. Due to the mismatch in angles there is a gap between the step and the extrusion, but I'm pretty sure it is now where it should be, mechanically and geometrically.
Further Violence
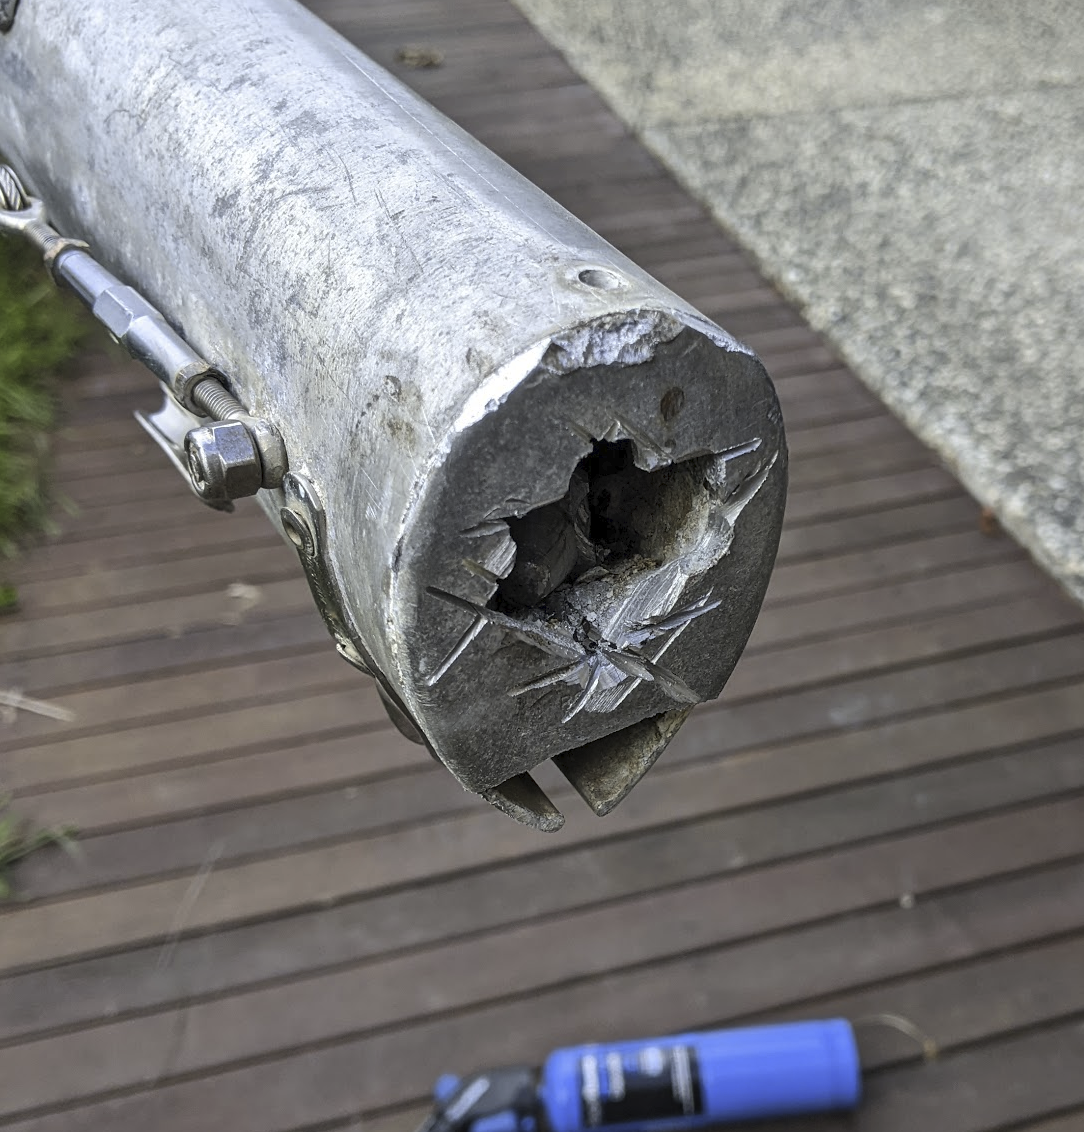
Now it was time to work on the base of the mast. Getting the old casting off was an absolute turbo-mongrel of a job. I'd hoped I could just drill out the single rivet holding it on and tap it out with a sacrificial chisel on an edge of the casting. Absolutely not. It would not move even a micron. I heated up the mast with the blowtorch to try to loosen the joint – not a sausage. It was stuck in there solidly.
I drilled some holes in it to loosen it up. I broke one drill bit and dulled another on some hidden stainless before giving up. I resorted to a cutoff blade in an angle grinder to mangle the end, being careful not to nick the mast itself. This was cathartic but didn't get me any closer to taking it off. The breakthrough was using a metal blade in a jigsaw to cut through the casting up to the extrusion. This broke the circumference of the casting and gave me a fighting chance of releasing it from the mast.
Once I got the old one out it was a simple matter of tidying up the cruft inside the mast, tapping in the new one and riveting it in place. Job done! The initial fit wasn't as snug as I'd hoped, but it was rigidly in place after 3 5mm pop rivets. This joint is only ever in compression, so it's not going anywhere.
I had hoped this new step would let me raise the mast solo. After a few hazardous attempts, the creation of a very long steel fork apparatus, and much muttering about triangles I deferred that goal to another day and enlisted Michelle's help. Together we easily raised the mast in one smooth controlled operation. A definite improvement over the old system.
Tomorrow: Moreton Bay!
Picnic time
We've sailed past the Colmslie Beach Reserve a few times now, and our boat is specifically designed to be sailed up onto a beach, so we decided our next trip would involve a beach picnic. We packed an esky with some vegemite and peanut butter sandwiches, apples, a thermos of ice coffee, a blender bottle of local soylent analogue, and museli bars then buried it all in zooper doopers.
2024-01-05 Brisbane River to Colmslie Beach Reserve
We have our process pretty well nailed down now, so we were in the water in under 20 minutes. Just before our previous sail we met a nice bloke at the boat ramp named Rod. He lives aboard one of the boats moored just off the ramp. He seemed dead pleased by our pool scoop we brought along for fishing floating rubbish out of the river. Whenever we see anything floating by we attempt to drag it up. We did find an entire Monobloc chair floating down the river but we didn't have space on the boat.
Alex's tacking performance continued to improve and we made good speed upwind, downriver. We did get stuck drifting towards an anchored boat after a failed tack, prompting us to man the oars as a contingency. Fortunately we were able to pick up the wind again before we ran out of room. We had stronger and gustier wind today than ever before, producing some sporty sailing. Michelle had to move about the boat to help with balance. Alex became uncertain he possessed the mettle for sailing as the sails snapped full of wind on a gust and we surged forward. Sam was cackling like a madman. Good times
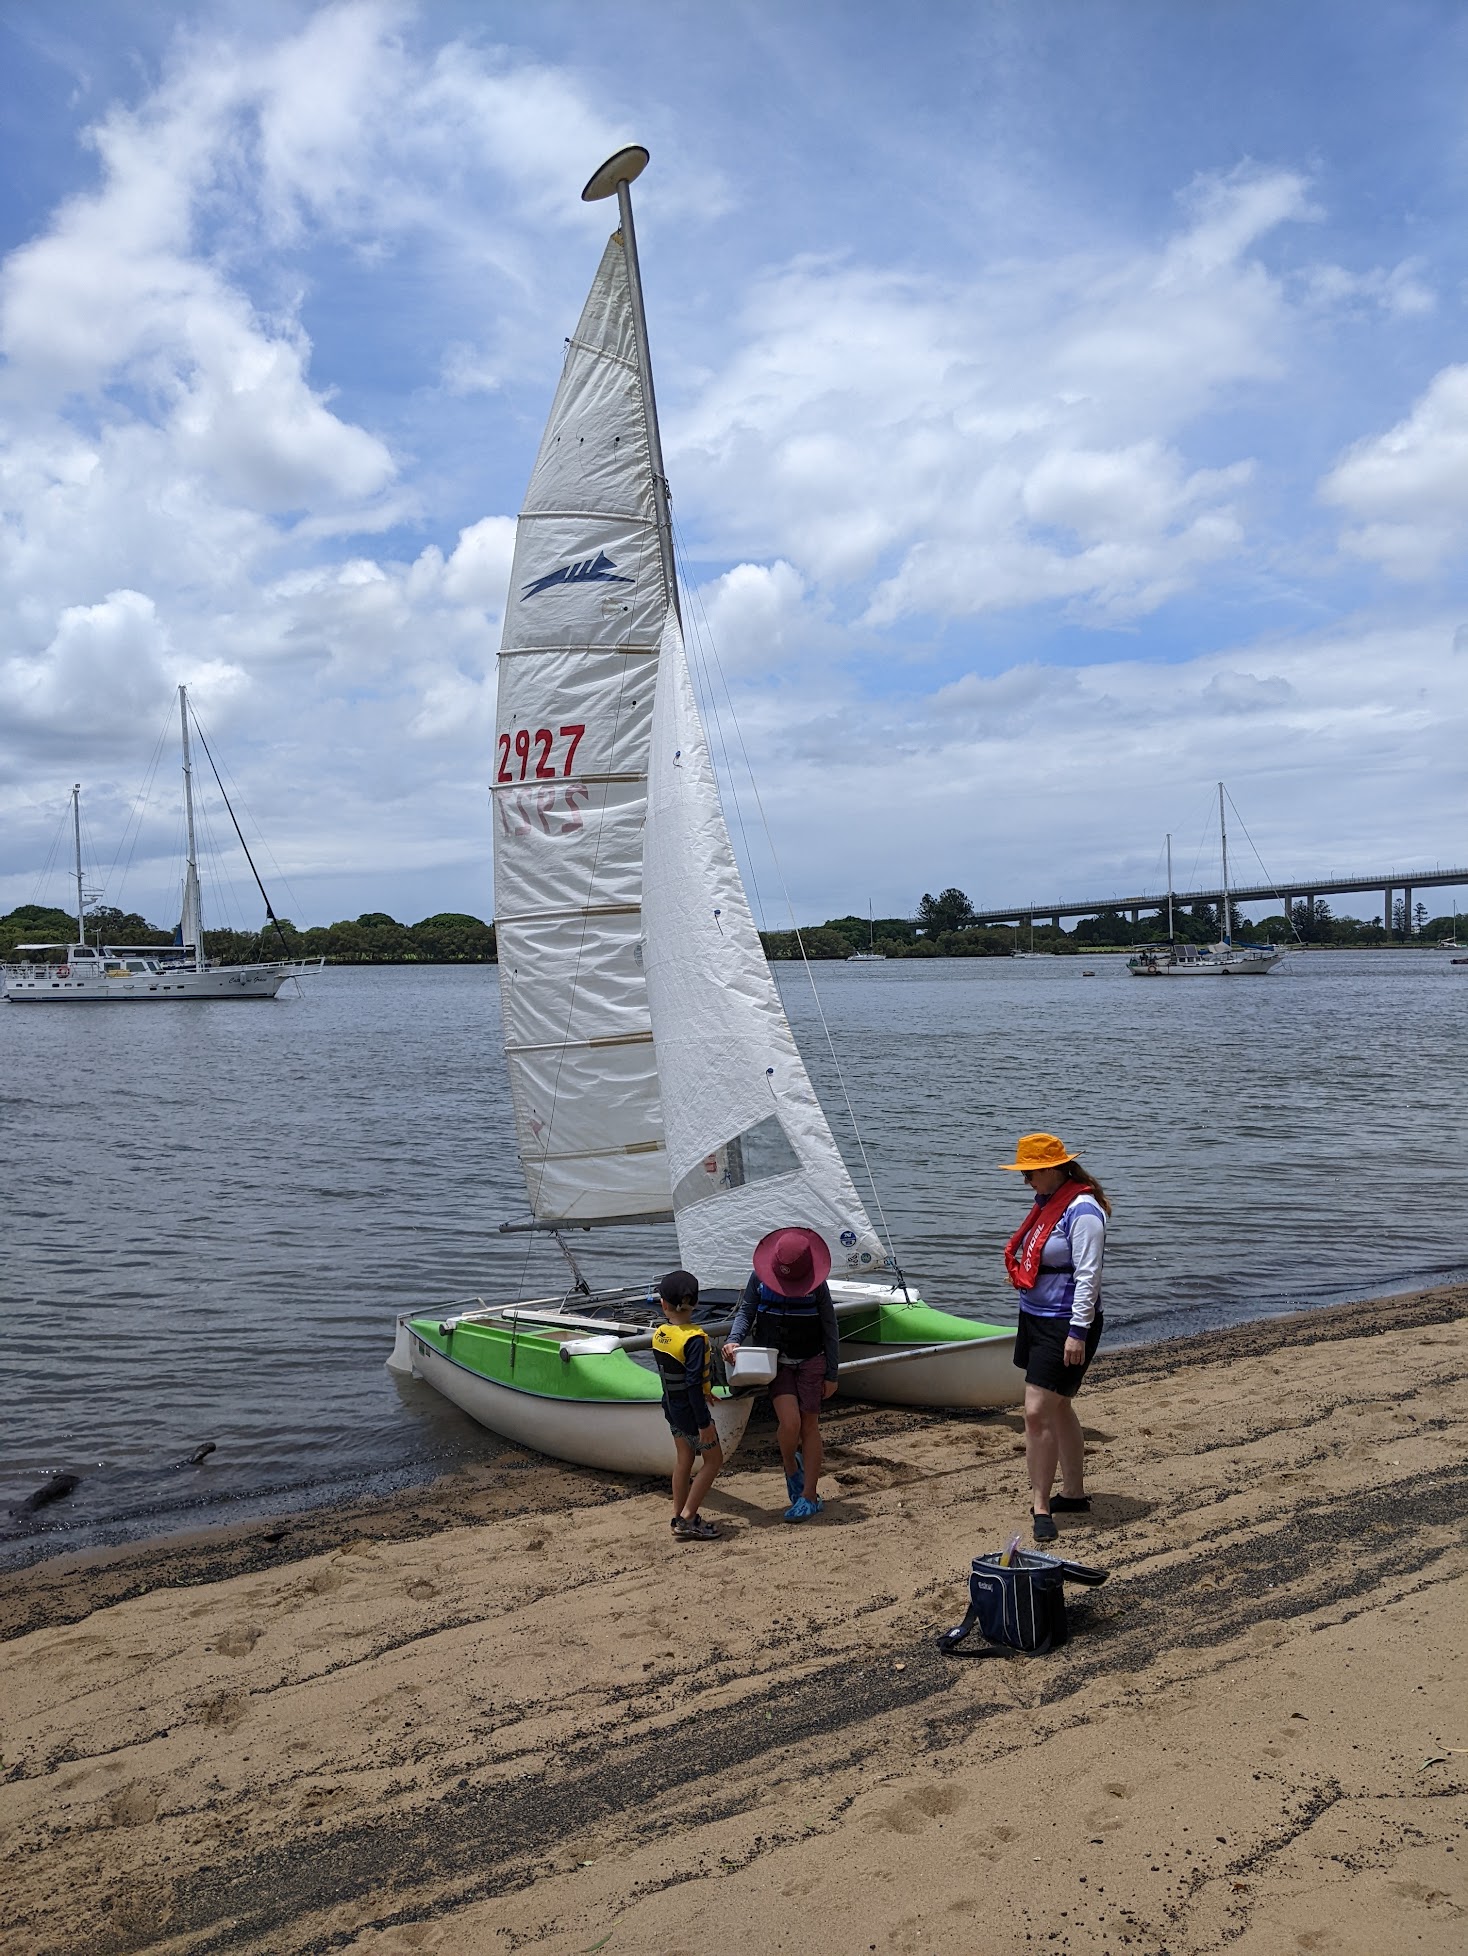
As we turned in towards the beach Michelle lost her hat again. She was wearing Sam's favourite yellow wide brim school hat. Sam was being performatively sad while we circled around a few times and managed to retrieve it before it sank, to much merriment. We then lined up a course that would drive us straight into the beach. There was another family playing in the water as we approached. They appeared nonplussed as we coasted up onto the sand. I jumped off the front and found the boat easy to drag it further up, so the rising tide didn't rob us of our boat during lunch.
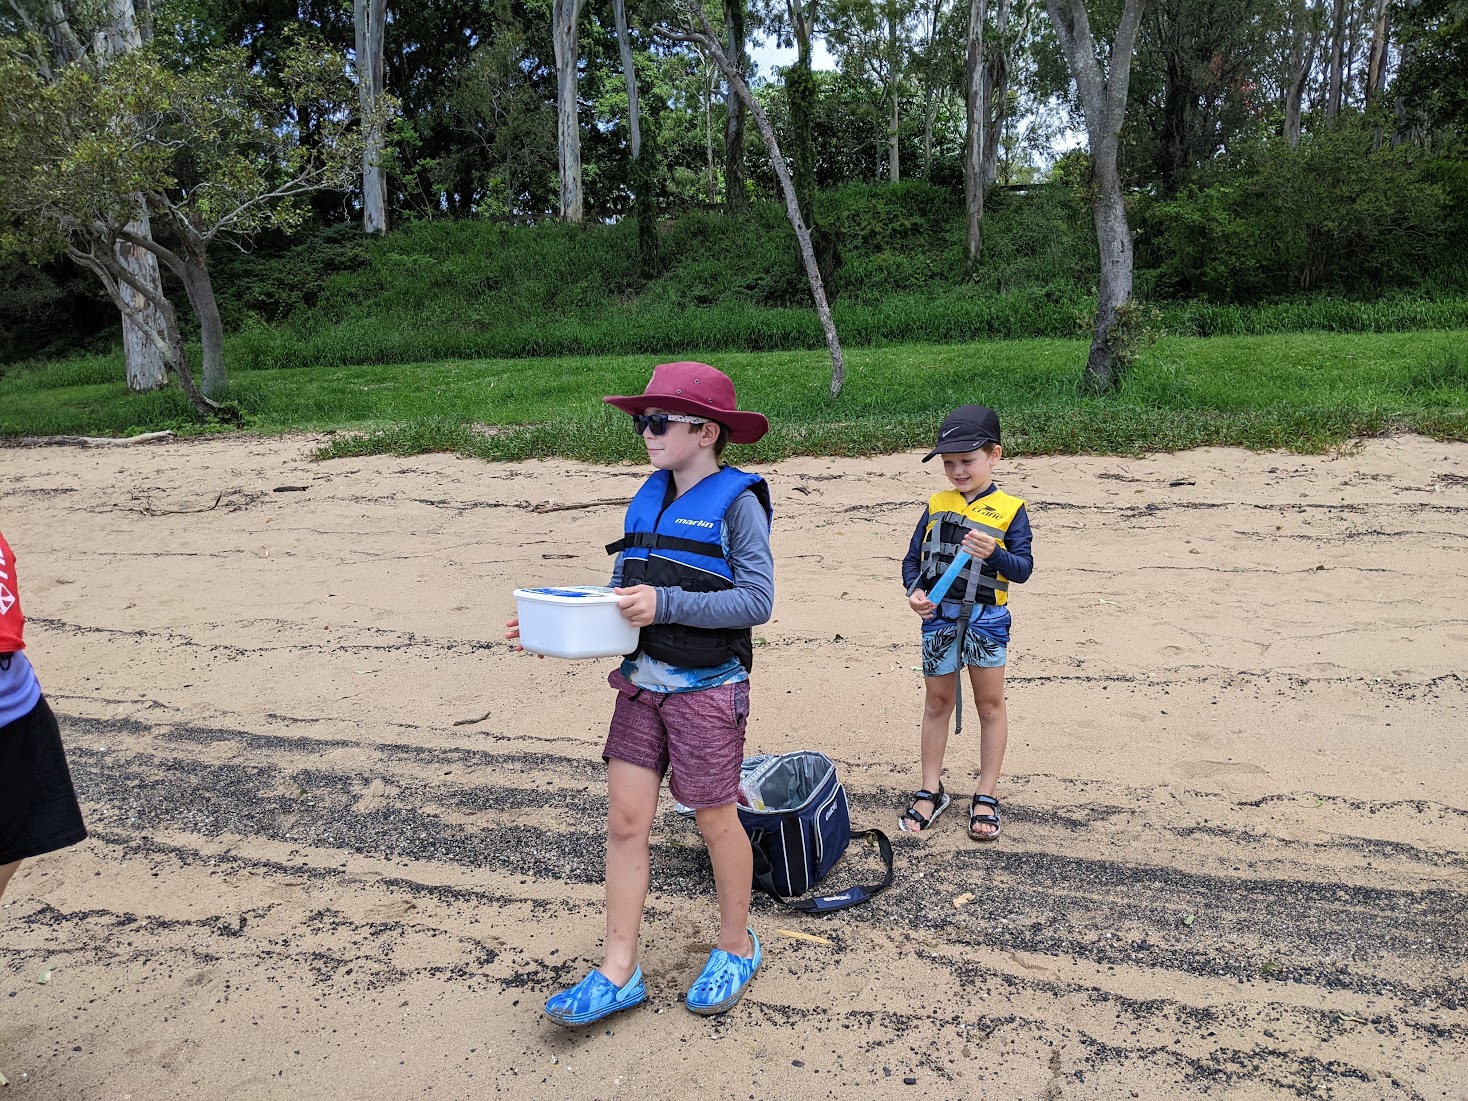 Sam tried to go straight for dessert.
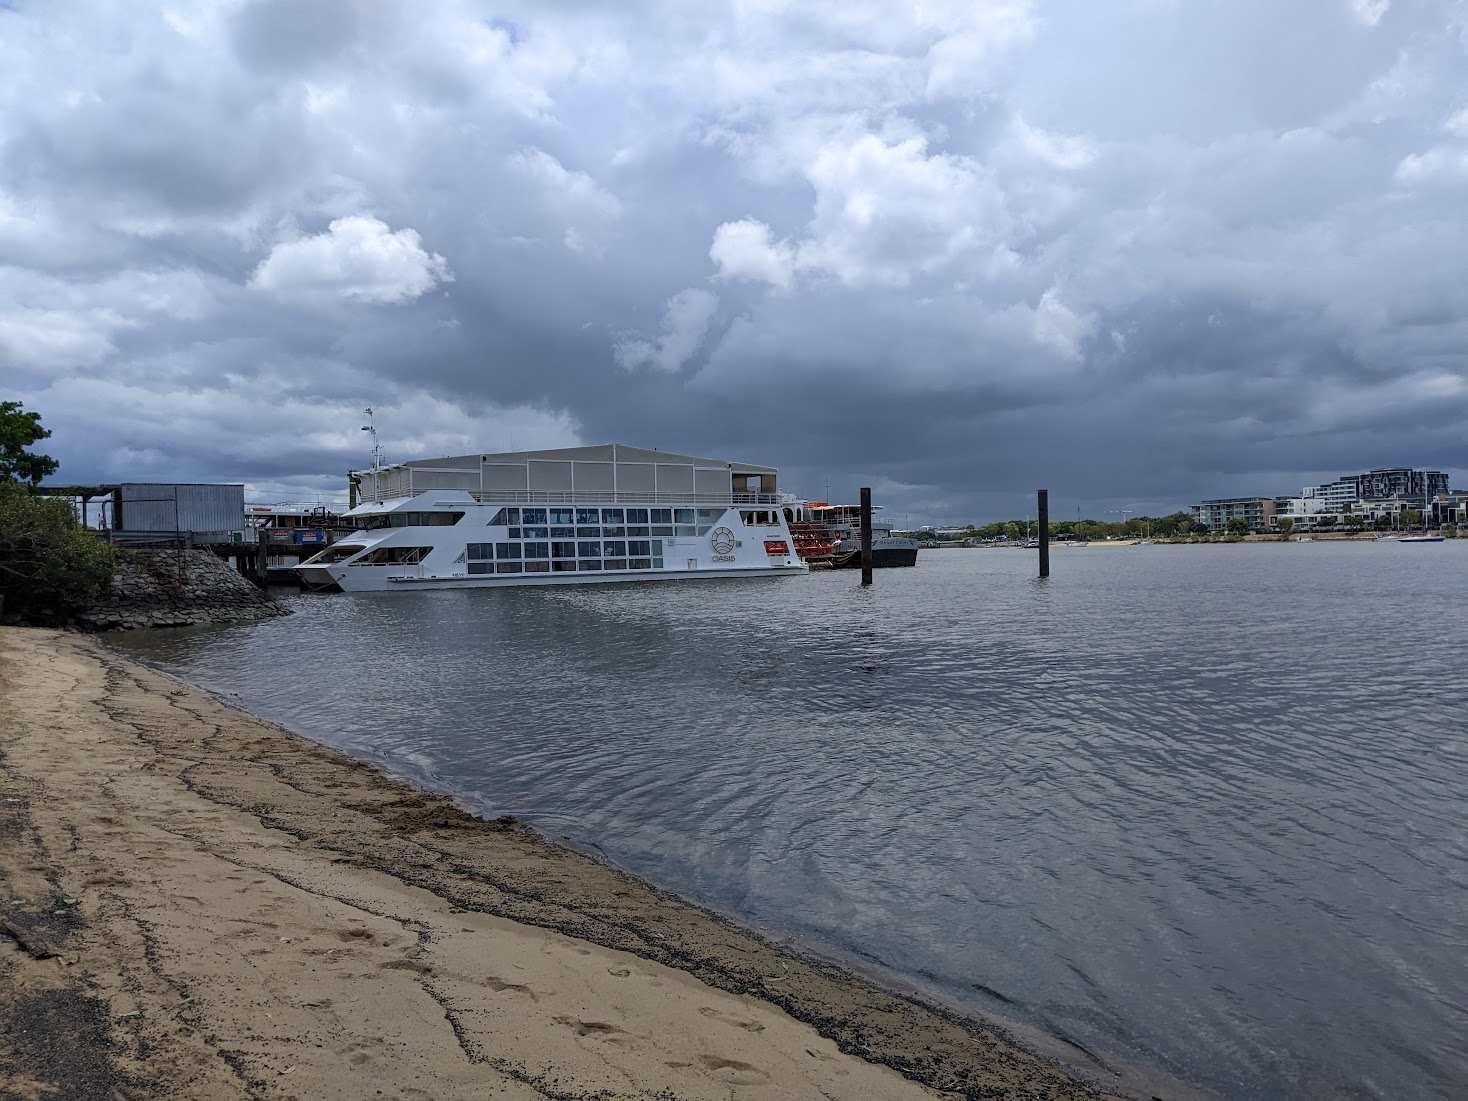 Just to the right of the big white boat you can see the paddleboat on which Michelle and I got married, the Kookaburra River Queen.
It was pretty great to be able to reach into the boat and pull out goodies. There's loads of storage space in there. I can't want to go camping somewhere on Wivenhoe.
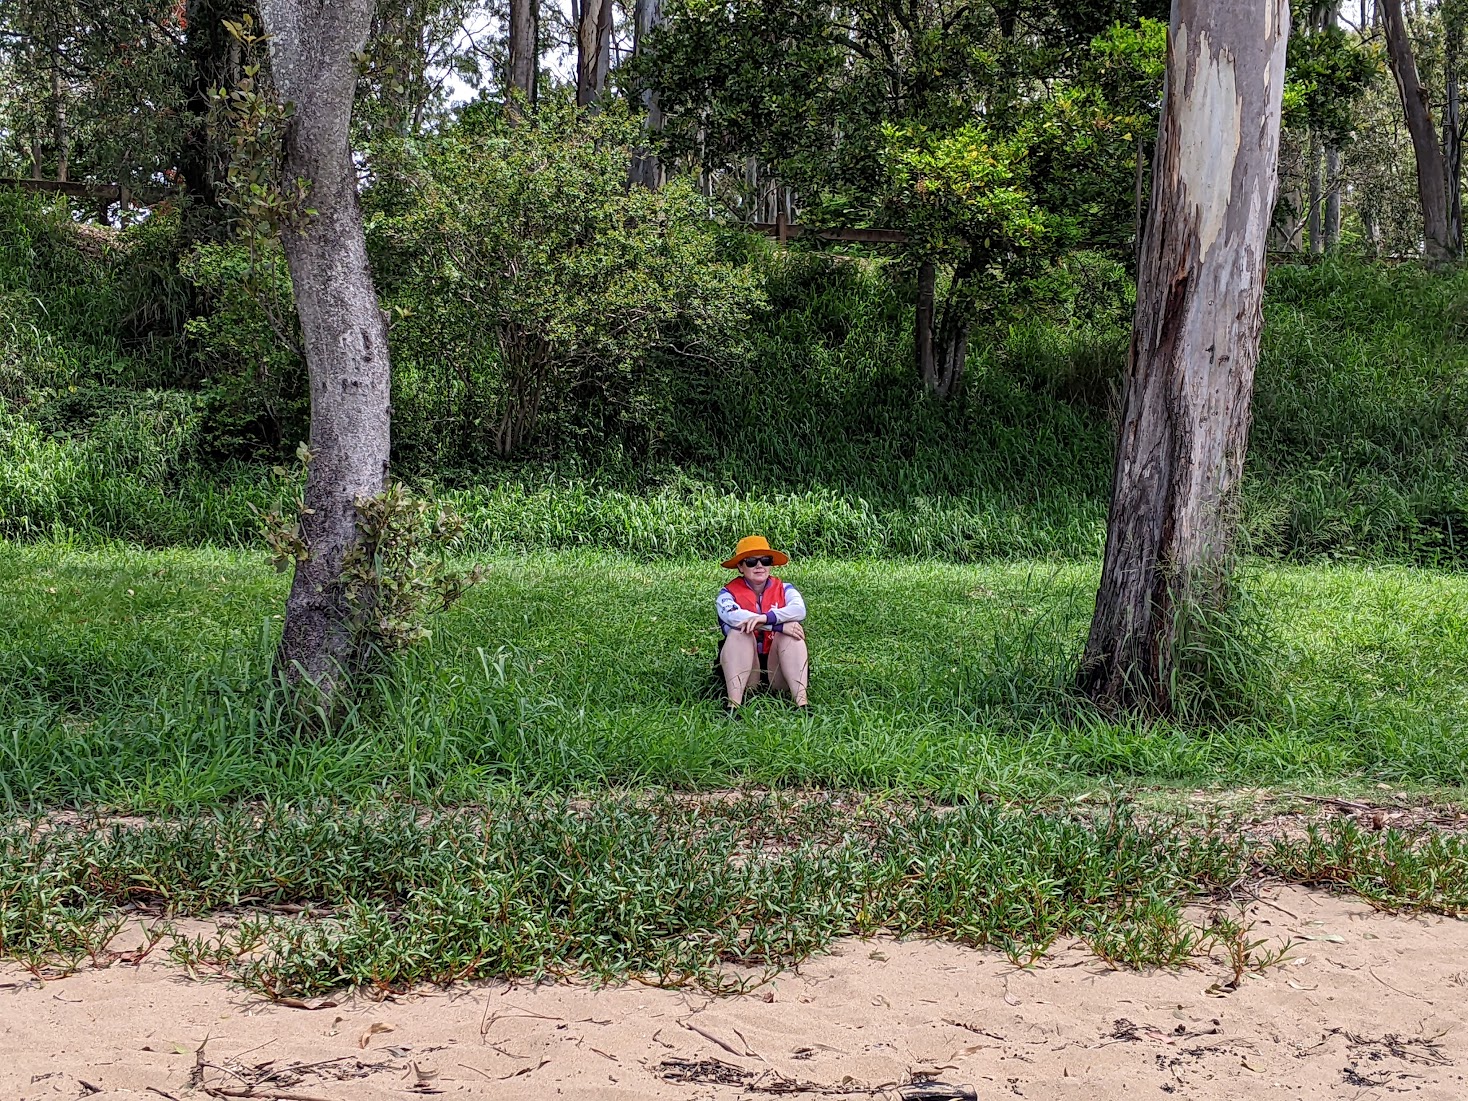 Michelle having some quiet time in the shade.
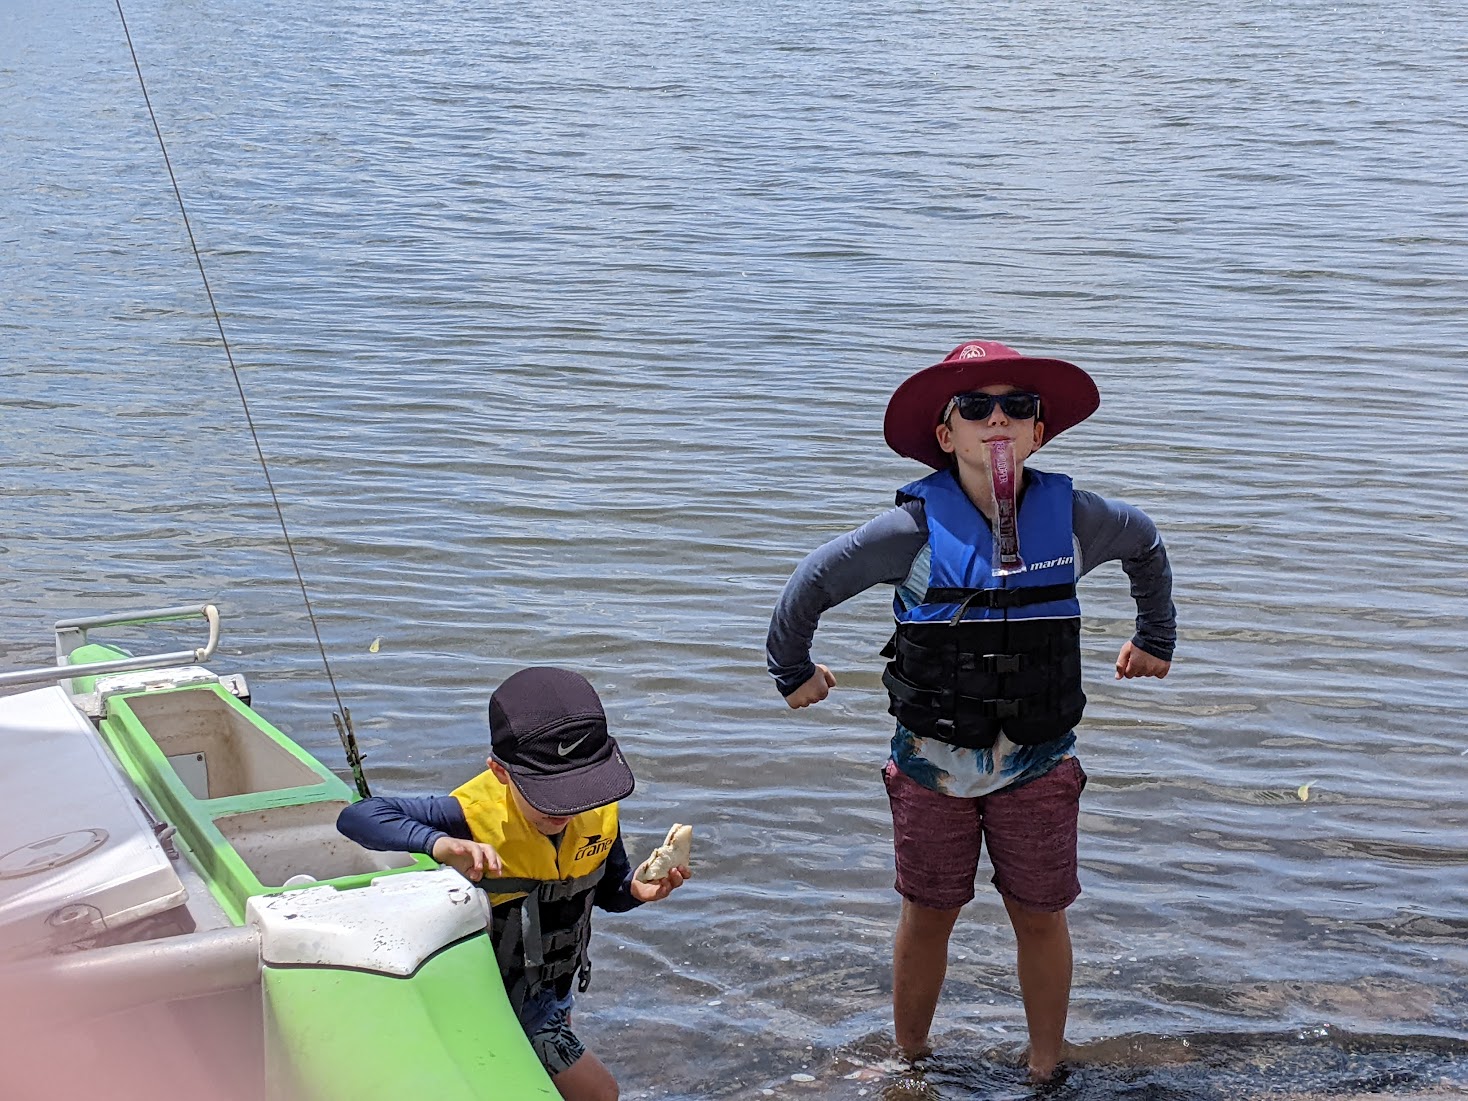 Alex with a coveted purple zooper dooper. Sam kept “accidentally” dropping the crusts of his sandwich in the river, to the delight of some plump toadfish in the shallows.
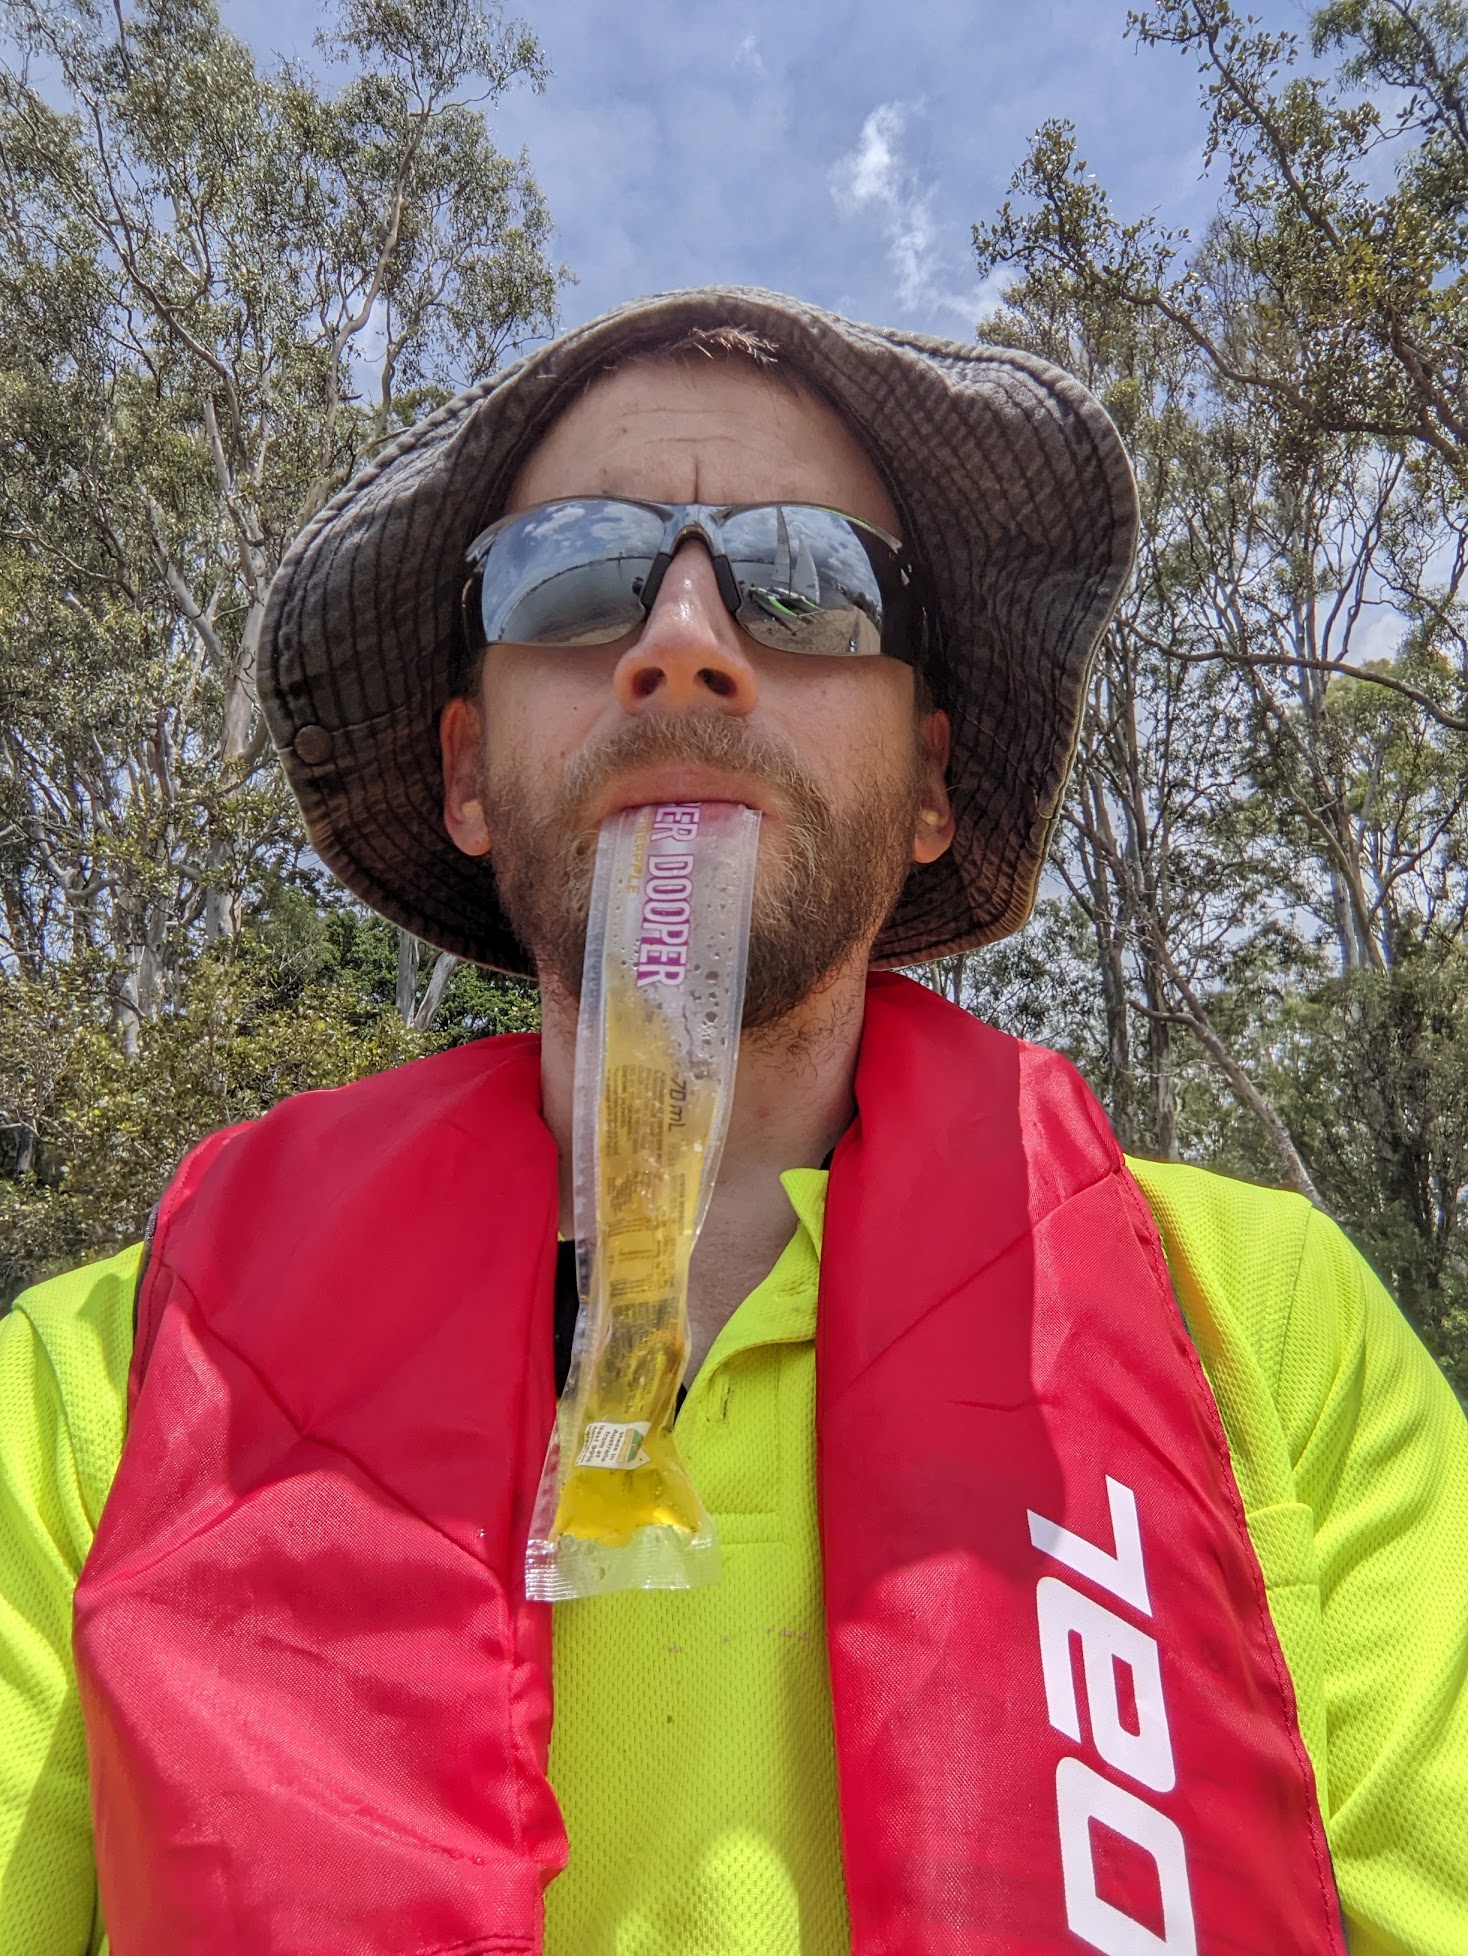 I got stuck with the less desirable pineapple zooper dooper.
The return run was smooth until we got to the dock next to the boat ramp. We'd never made an approach in these conditions so it was pretty hairy and we had to make a few runs at it. Rod was keeping an eye on us from his tender as he ferried some folk over to his boat. We made contact with the dock on the third try. I tasked Alex with tying us off to the dock. He leapt over and then realised he didn't bring the mooring line with him. I jumped off too and tied us off.
I developed an innovation for making it easier to get the boat back onto the trailer: The mooring line is tied around the base of the mast. I tied the free end to an aluminium bit near the rear of the boat. This meant I could stand on the dock and control the position and orientation of the boat to guide it onto the trailer. It made this process trivial, even with wind and current. We got up into the carpark, removed the bungs, tilted the boat up and discovered the hulls were 🎉 completely dry 🎉. The leak was actually now properly fixed, happy days.
Getting the hang of this thing
In addition to fixing¹ the leak in the left pontoon there were some other things I wanted to sort out before going sailing again. The leading edge (luff) of the jib was loose. Loose sails make you sail bad so I added a couple of ties to the top and bottom to hold it taut along the stainless wire. The mast has a float at the top to prevent the boat flipping completely upside down when you capsize. It got bonked on the ground when we dropped the mast earlier, so I pulled it apart and re-joined it with copious quantities of glue and silicone. I was now more confident in it keeping water out while we scurry about trying to work out how to un-capsize a boat.
The jib kept getting stuck on a saddle on the front of the mast during tacks, so I drilled that off and riveted the holes shut. It's a bit of a mystery as to why it was there, but it's gone now. There were a few other little problems to sort out, but the only remaining big thing required me to travel backwards in time to fix it before going on our first sail. I won't bore you with the details of the time travel but I will bore you with details on fixing the trampoline during a rainstorm.
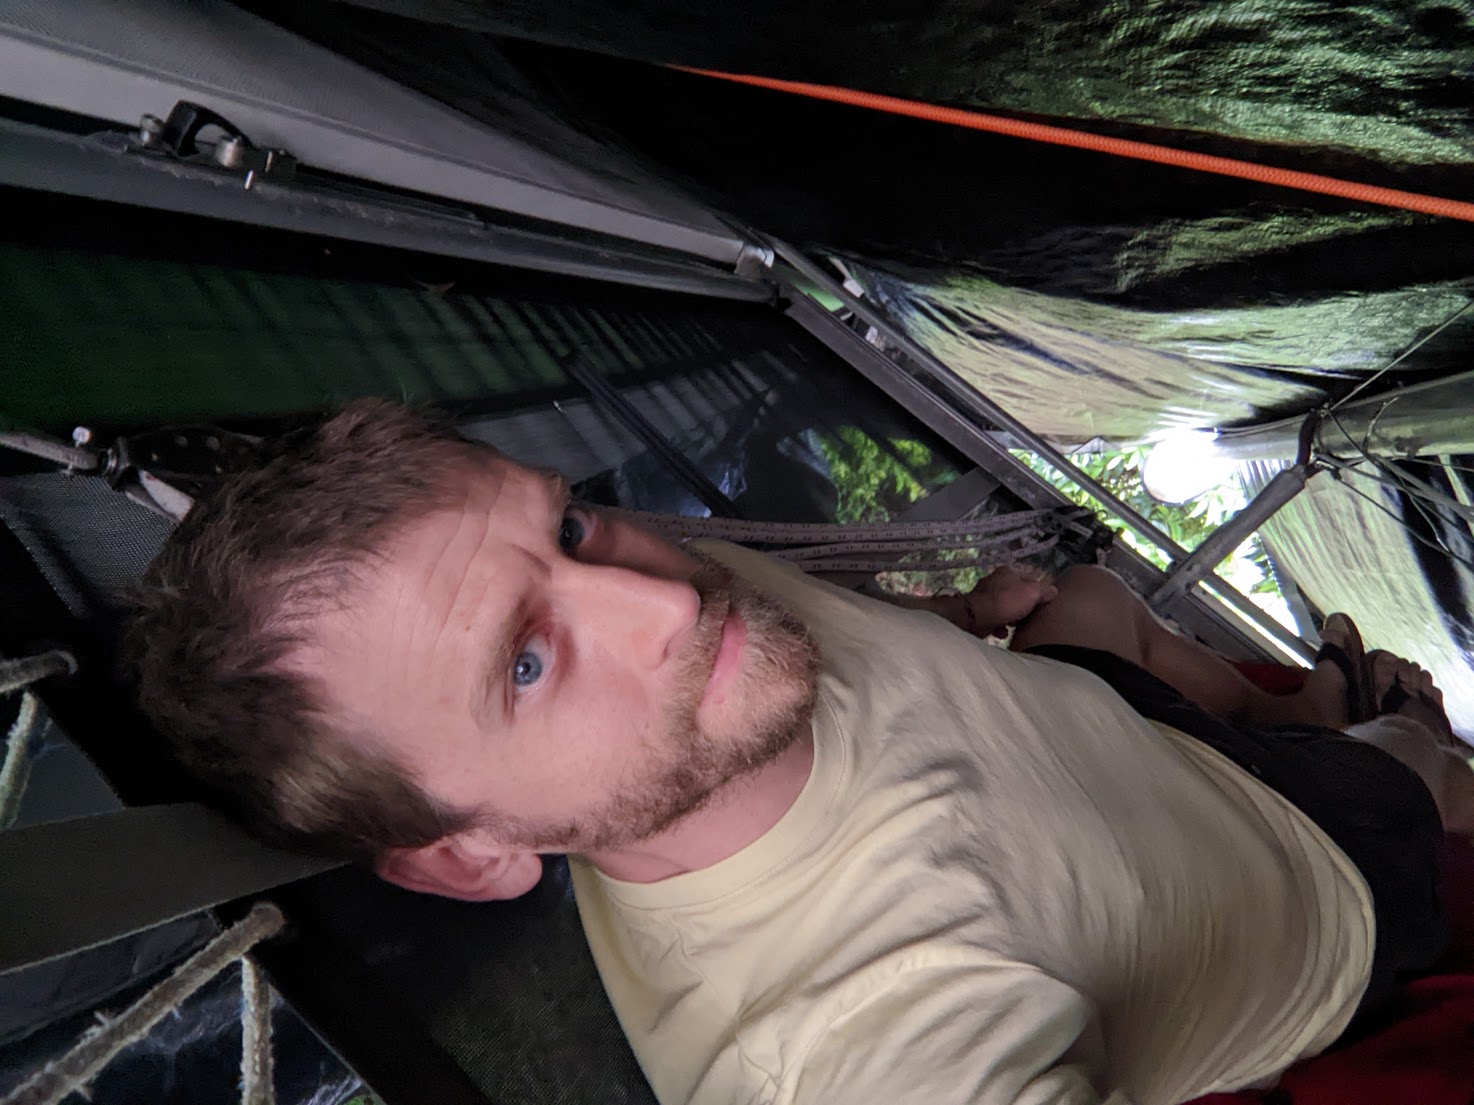
The tramp is the square fabric floor of the boat, strung between four aluminium extrusions just aft of the mast. On the back and sides it's held on with a rope sewn into the edge of the tramp and threaded into a slot in the extrusion. This edge rope had pulled out of the slot in one spot, so there was a gap between the tramp and the extrusion. Not a huge deal, but it could get worse with time. Fixing it required drilling out the rivets holding on one of the lengthways aluminium side bits to release tension on the tramp. This let me drag the tramp edge out of a flared portion of the slot, and then pull it back in properly. This job sucked, but I was happy to have it done. I did have to cut one of the hiking straps to release tension enough to move the tramp, but I patched it up with a length of seatbelt material.
2024-01-03 Brisbane River
Preparations
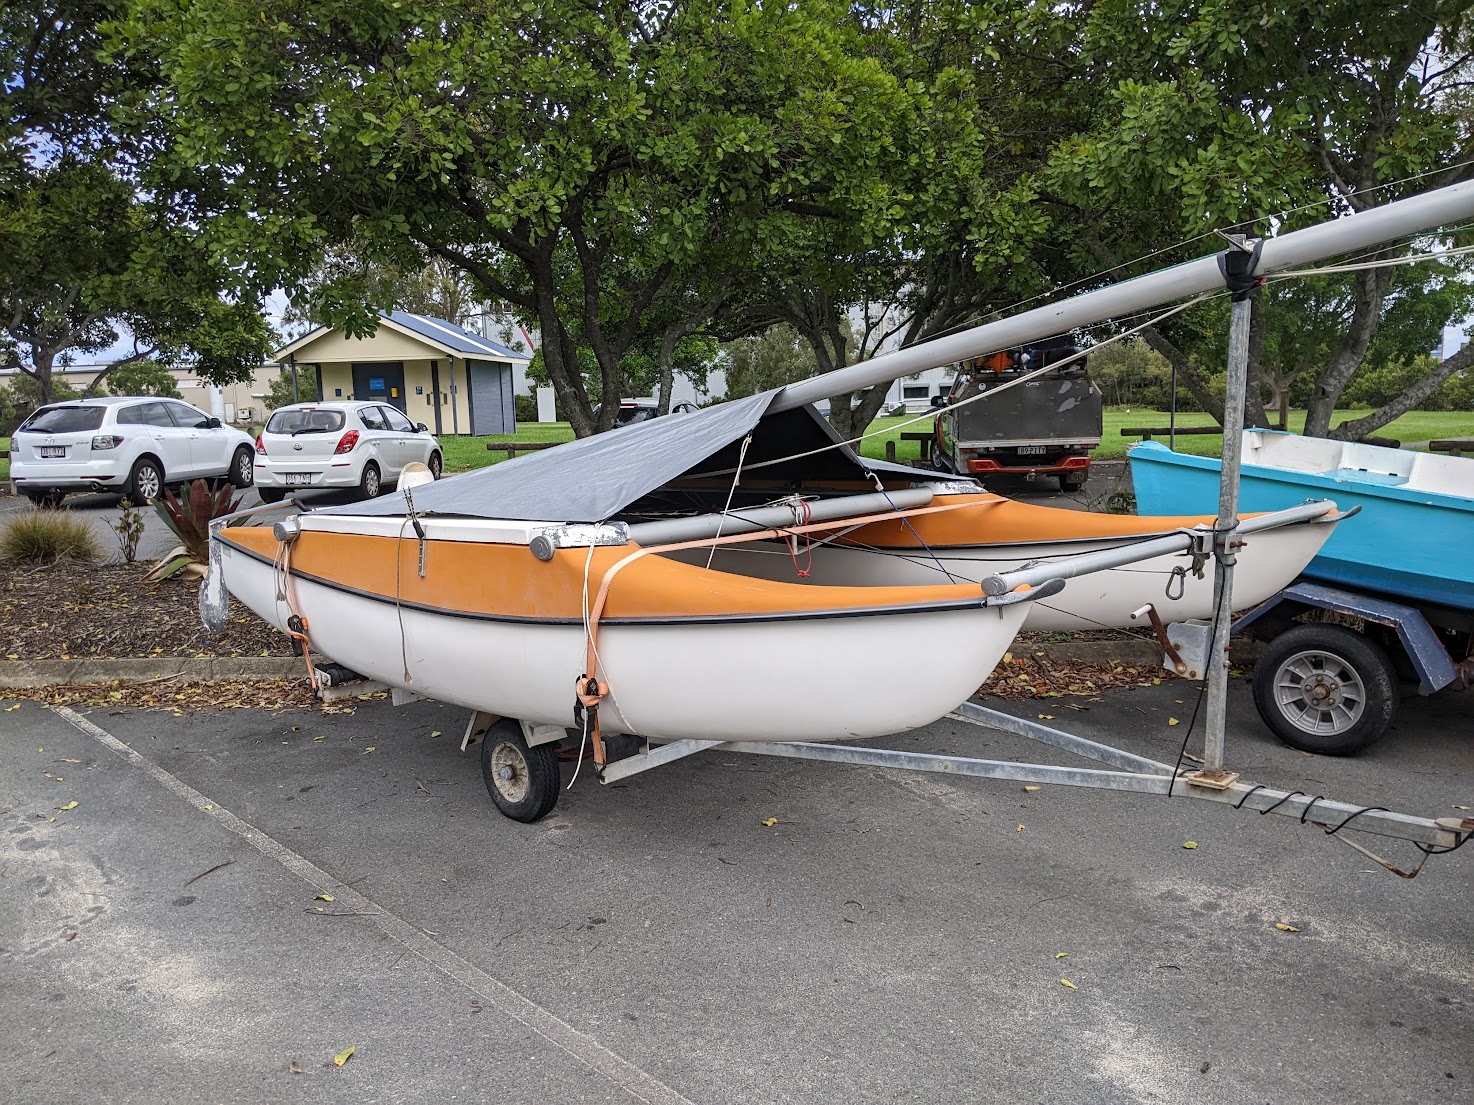
This time we were on the road by 10:15 and ready to sail by 11:00. Still room for improvement. This included a distraction: At the boat ramp we spotted a sibling: another caper cat!
It looked a little more weathered than ours. It had the same corrosion on the rudders. It also had an improved mast step and base arrangement
It looks like it has an open hinge that would let you raise the mast by pivoting it upright, pulling on the forestay, rather than lifting the mast straight up into place. Colour me interested. This would make raising the mast significantly less perilous.
On the water
Conditions were even more perfect than on our first sail. A gentle, steady breeze and an overcast sky. We cast off with the goal of sailing around the pillars of the gateway bridges. Alex and I had sat down the previous night with some books about sailing and I talked him through the basics of tacking and gybing. The goal was being able to leave him in charge of the jib. He did really well! These catamarans don't have a keel, so we can't point as far into the wind as we could in a keelboat like the Elliot 6, so tacking from one side of the wind to the other takes a little while. Power from the jib is pretty important to pull the boat out of the tack, so on a few occasions we had to abort a tack, let the current carry us downstream a little way, then give it another shot. After about five tries goes our success rate was above 80%.
At some point Michelle's hat flew off into the water. We performed a shonky man overboard maneuver to swing around and pick it up. Unfortunately we went straight over the top of it and it sank forever. This marks the start of a trend.
We were able to cruise straight upriver along the north bank for a while, watching out for stray drives from the Royal Queensland Golf Club. We sailed under the bridge, waving to the people fishing around the piers. On the east side we spotted a citycat moored next to a building with a yamaha logo on it. Do citycats have yamaha engines?
The trip back was straightforward and uneventful We did a few practice gybes for excitement, as long straight downwind runs can get a bit boring. Getting the boat back onto the trailer was a struggle – we must've fluked it the first time. Eventually we got it up and out of the water. When we pulled the bungs out I was hoping the left pontoon would be dry thanks to my repair work. ¹ Mais non! Even more water than last time poured out. This sail was a longer one, so I suspected a linear volume-to-sailing-time relationship. The hunt for the elusive leak would continue.
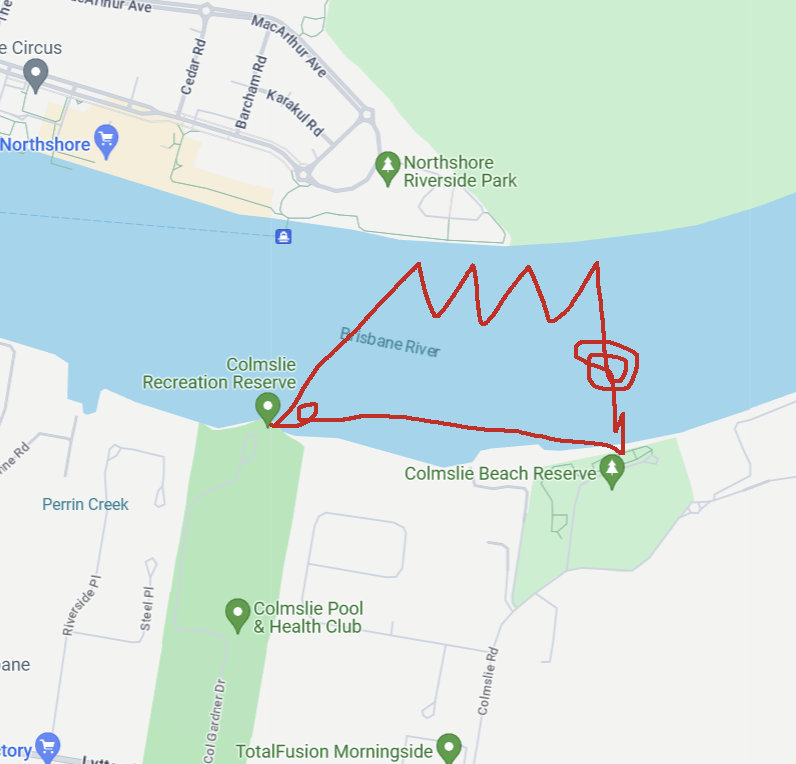
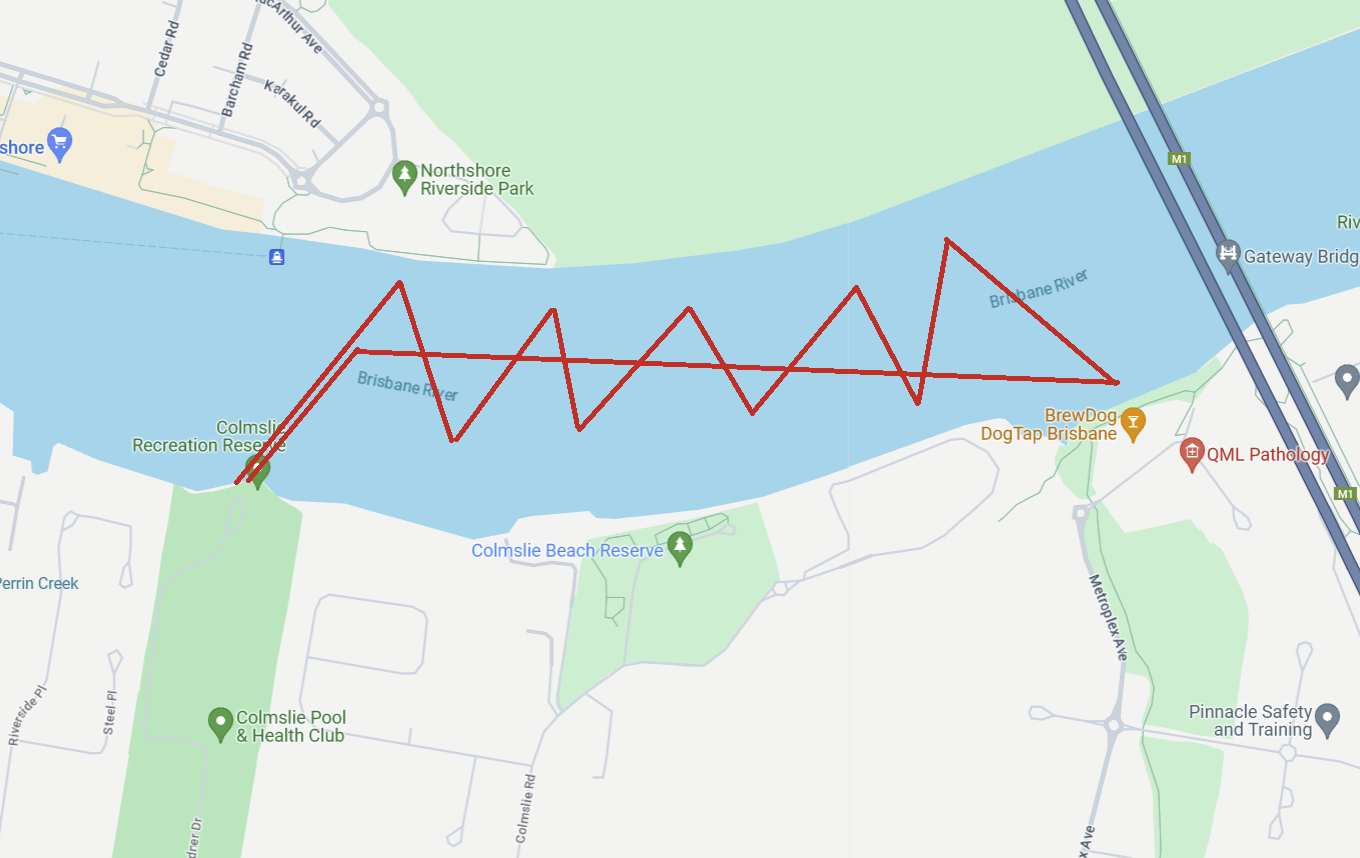
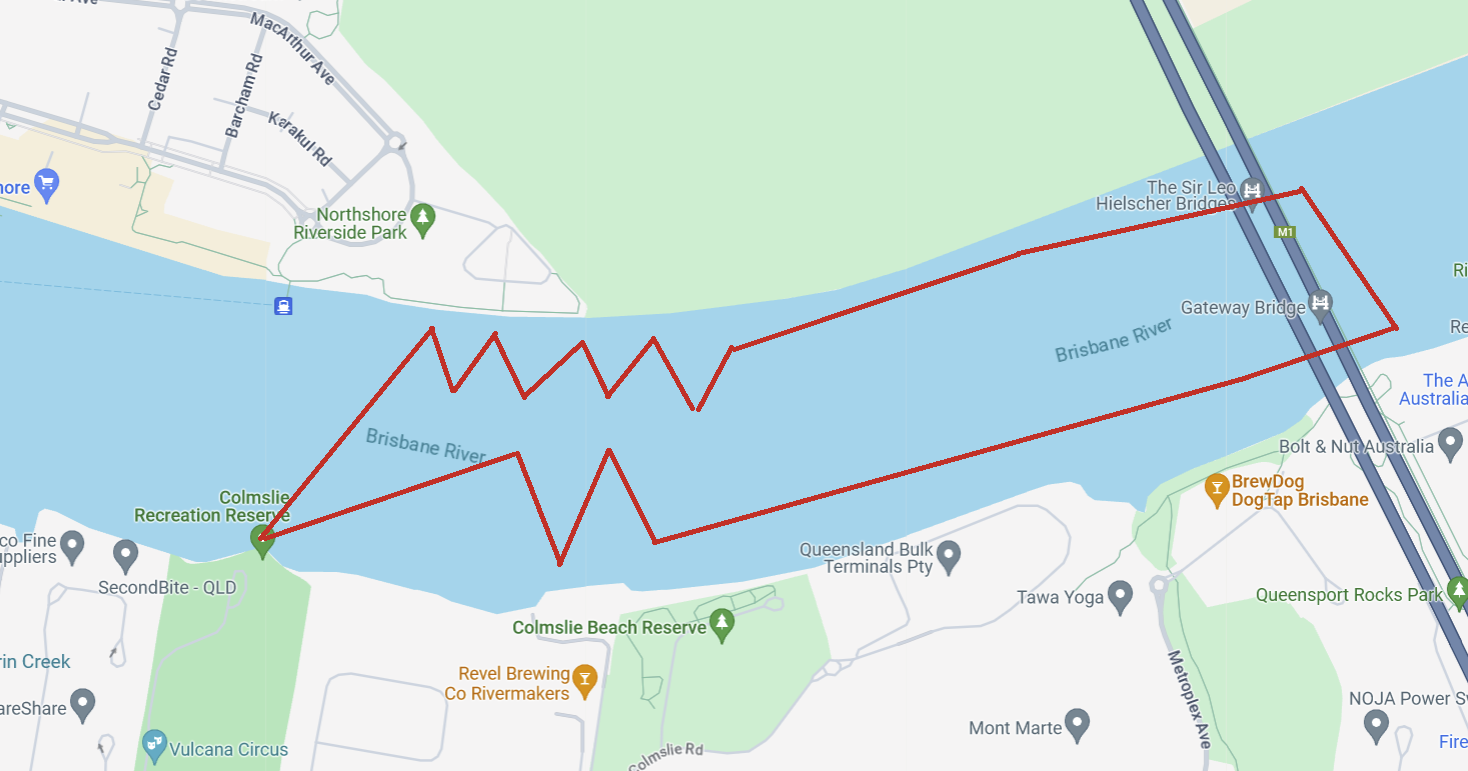 A very approximate map of our trip.
Back home
Once we got home and I'd hosed things down, I re-pressurised the hull and went on another thorough leak search. Again: nothing. Out of desperation I put the hose in the bunghole and squirted a heap of fresh water in, then put the bungs in. Lo and behold! A leak! The bastard bung itself was leaking! I'd replaced the old crumbly o-rings with roughly-correct ones from a big kit'o'rings, so my initial assumption was that I'd sized it wrong. But then…
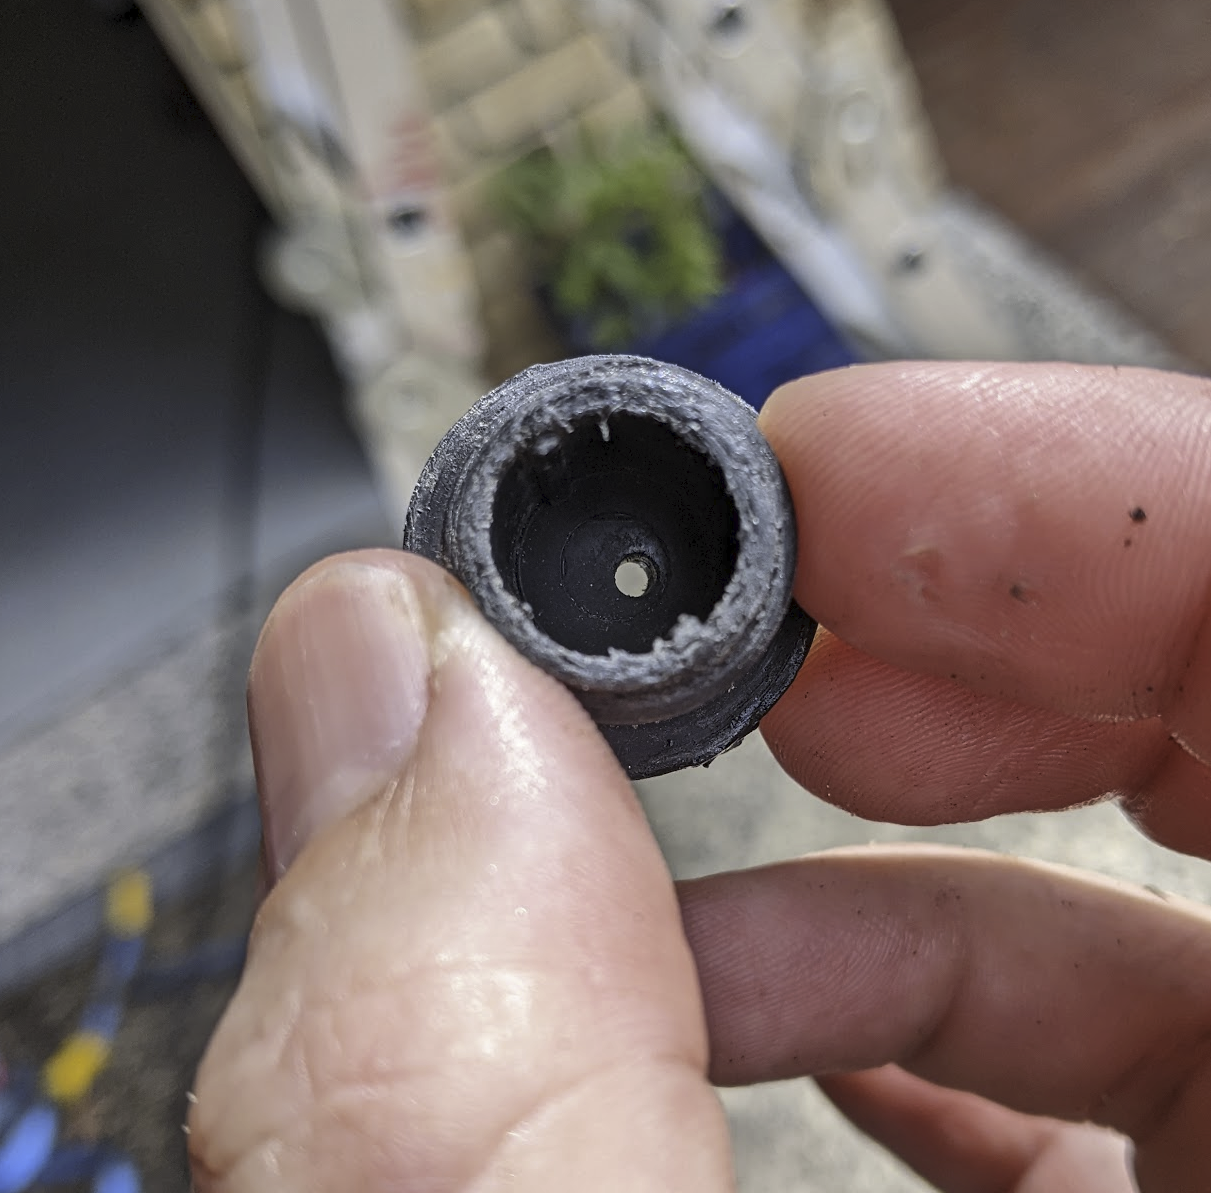
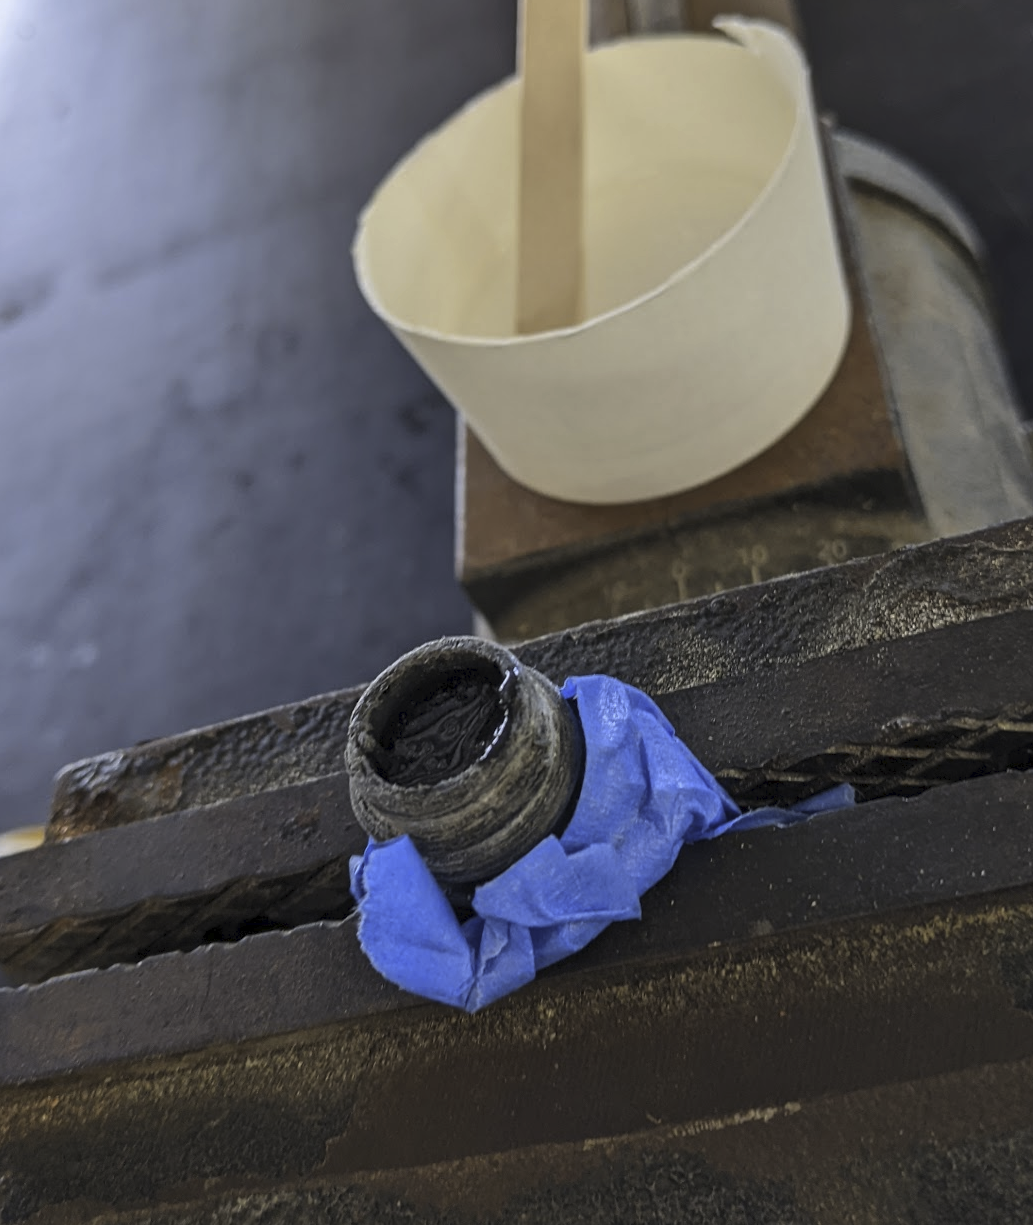
The bloody bung has a hole in it. Putting aside elaborate soap opera theories of sabotage I decided the most likely explanation was that these bungs are the same size as those used to hold the lids on the pontoons. At some point this might've had a string threaded through it in its duty as a lid-holder-downer rather than a water-keeper-outer. I mixed up a batch of the world's fastest epoxy and glorbed it into the bung.
Definitely really completely fixed now. For good.
Our First Outing
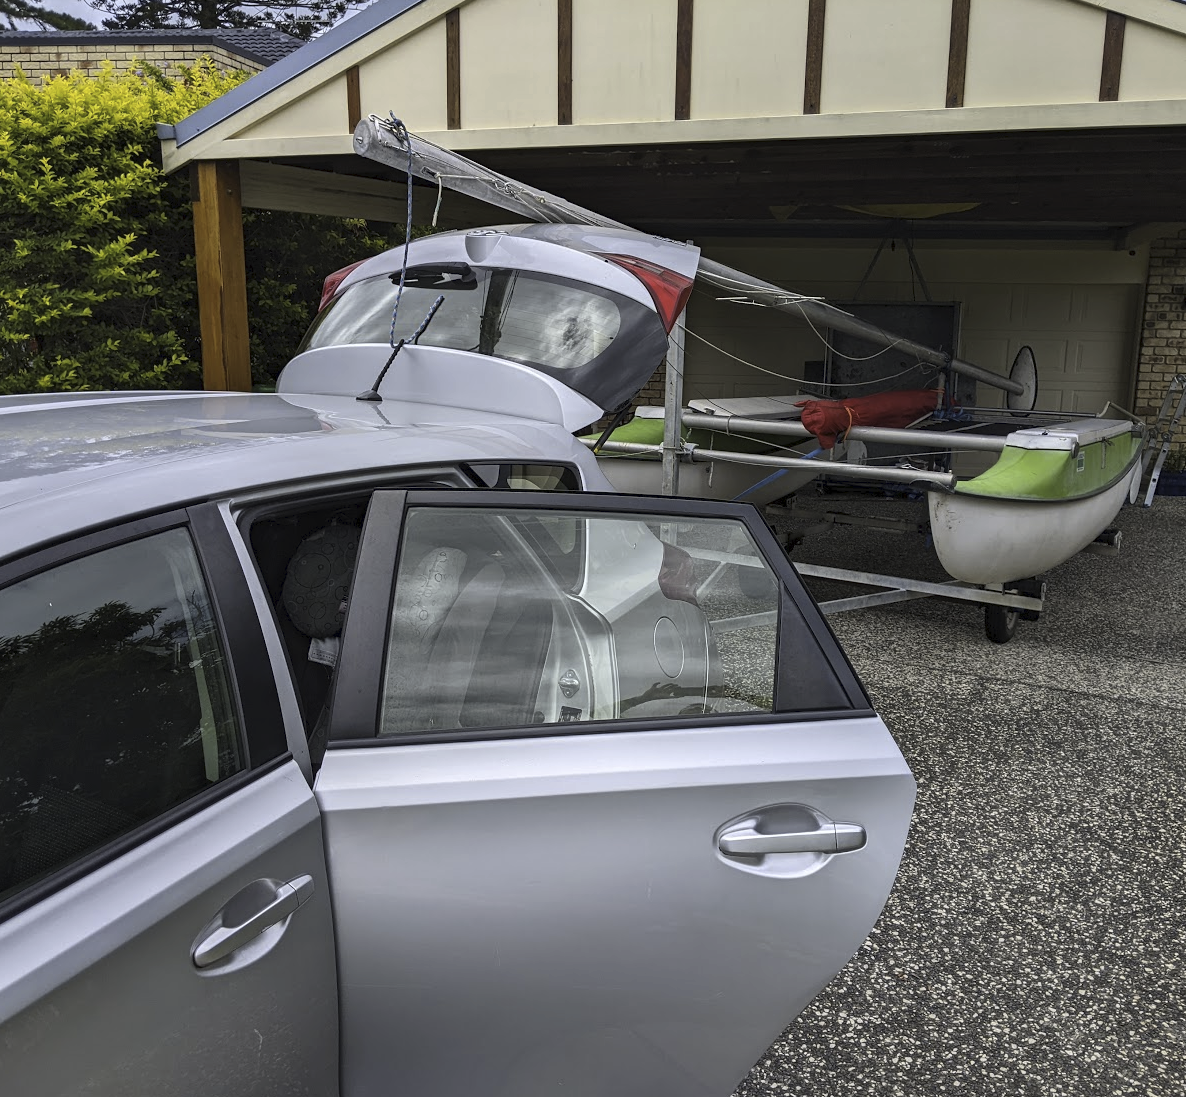
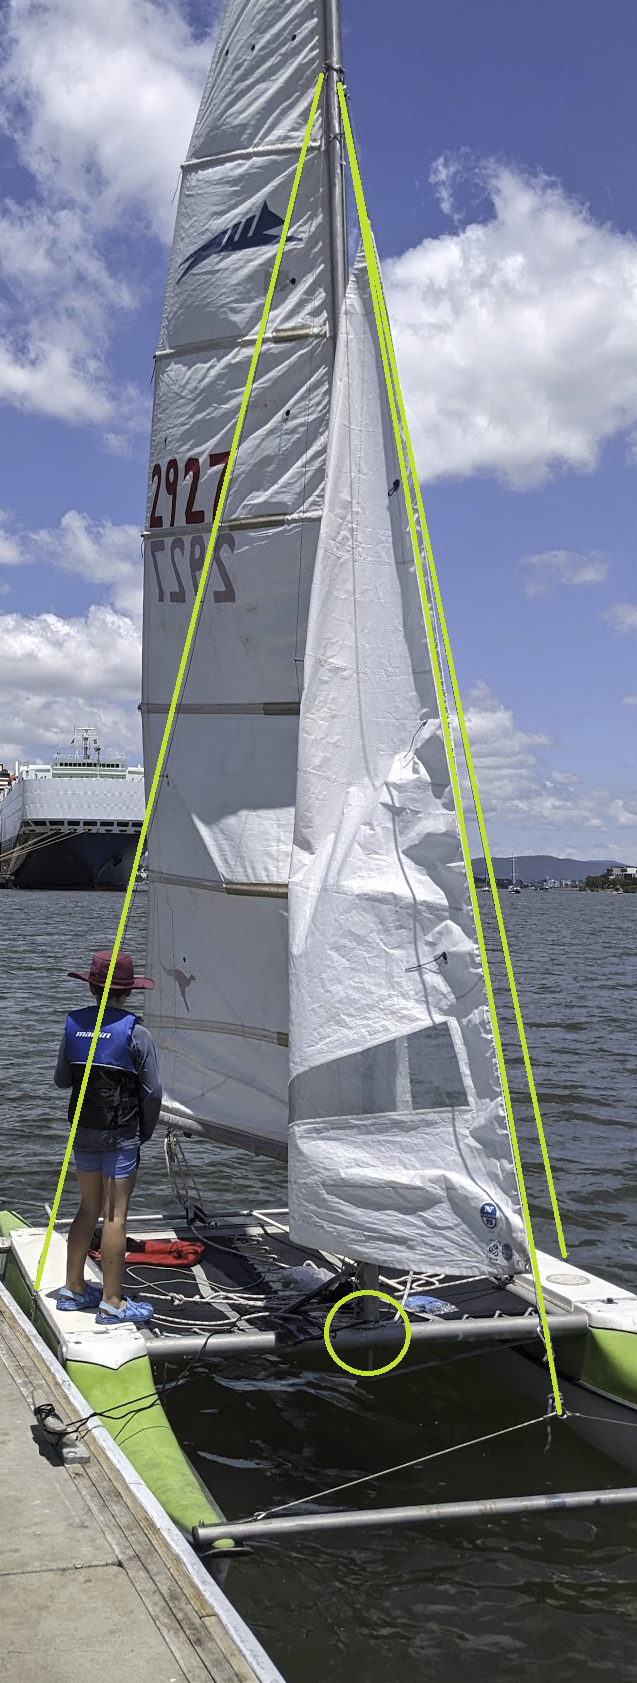
Soon after picking up the boat I enlisted Michelle's help in “stepping” (standing upright) the mast onto the boat on dry land for testing and practice. Neither of us fancied working out how to do this at a boat ramp with an audience. The mast has a pointy bit on the bottom that rests in a cupped divot on the middle lateral aluminium bar. The mast is held in place by three stainless steel wire “stays”. Two to the side and one to the front. These clamp the mast down to the boat. This feels as perilous as it sounds, but it seems to work.
It was wise of us to try this in the comfort of our own front yard - it took us a few goes to work out the order of operation. We ran into problems with weight distribution on the boat tipping the trailer up, and how best to lift the mast. Our first attempt lead to the mast being dropped onto a U-shaped mast rest on the trailer and the top end banging into the ground. Unfortunately my torso was above the shorter, lower arm of the balance lever and I spent three weeks enjoying some cracked ribs. I cannot recommend. We eventually worked out a sequence of steps to get the mast up and down with minimum calamity.
Now it was time to keep an eye on the weather forecast. We wanted a nice gentle 5-10 knots of wind and low chance of rain. Michelle and my sailing lessons were a few years ago now, and with two kids onboard a new-to-us boat we wanted to play it safe to build confidence before working up to some sportier sailing. Finally, on boxing day of 2023, we headed out for our first sail.
2023-12-26 Brisbane River
Brisbane has a river running through it, dotted with boat ramps. River sailing is generally safer because there's more boat traffic to help out if you get into a pickle, and the shore is always swimmably close if worst comes to worst. There are downsides though: Messy wind due to obstructions and lots of anchored boats to dodge. Our closest boat ramp is a ten minute drive from home, in the Colmslie Recreation Reserve. We'd been geocaching there in the past, and we'd been out more recently to scope out the lay of the land.
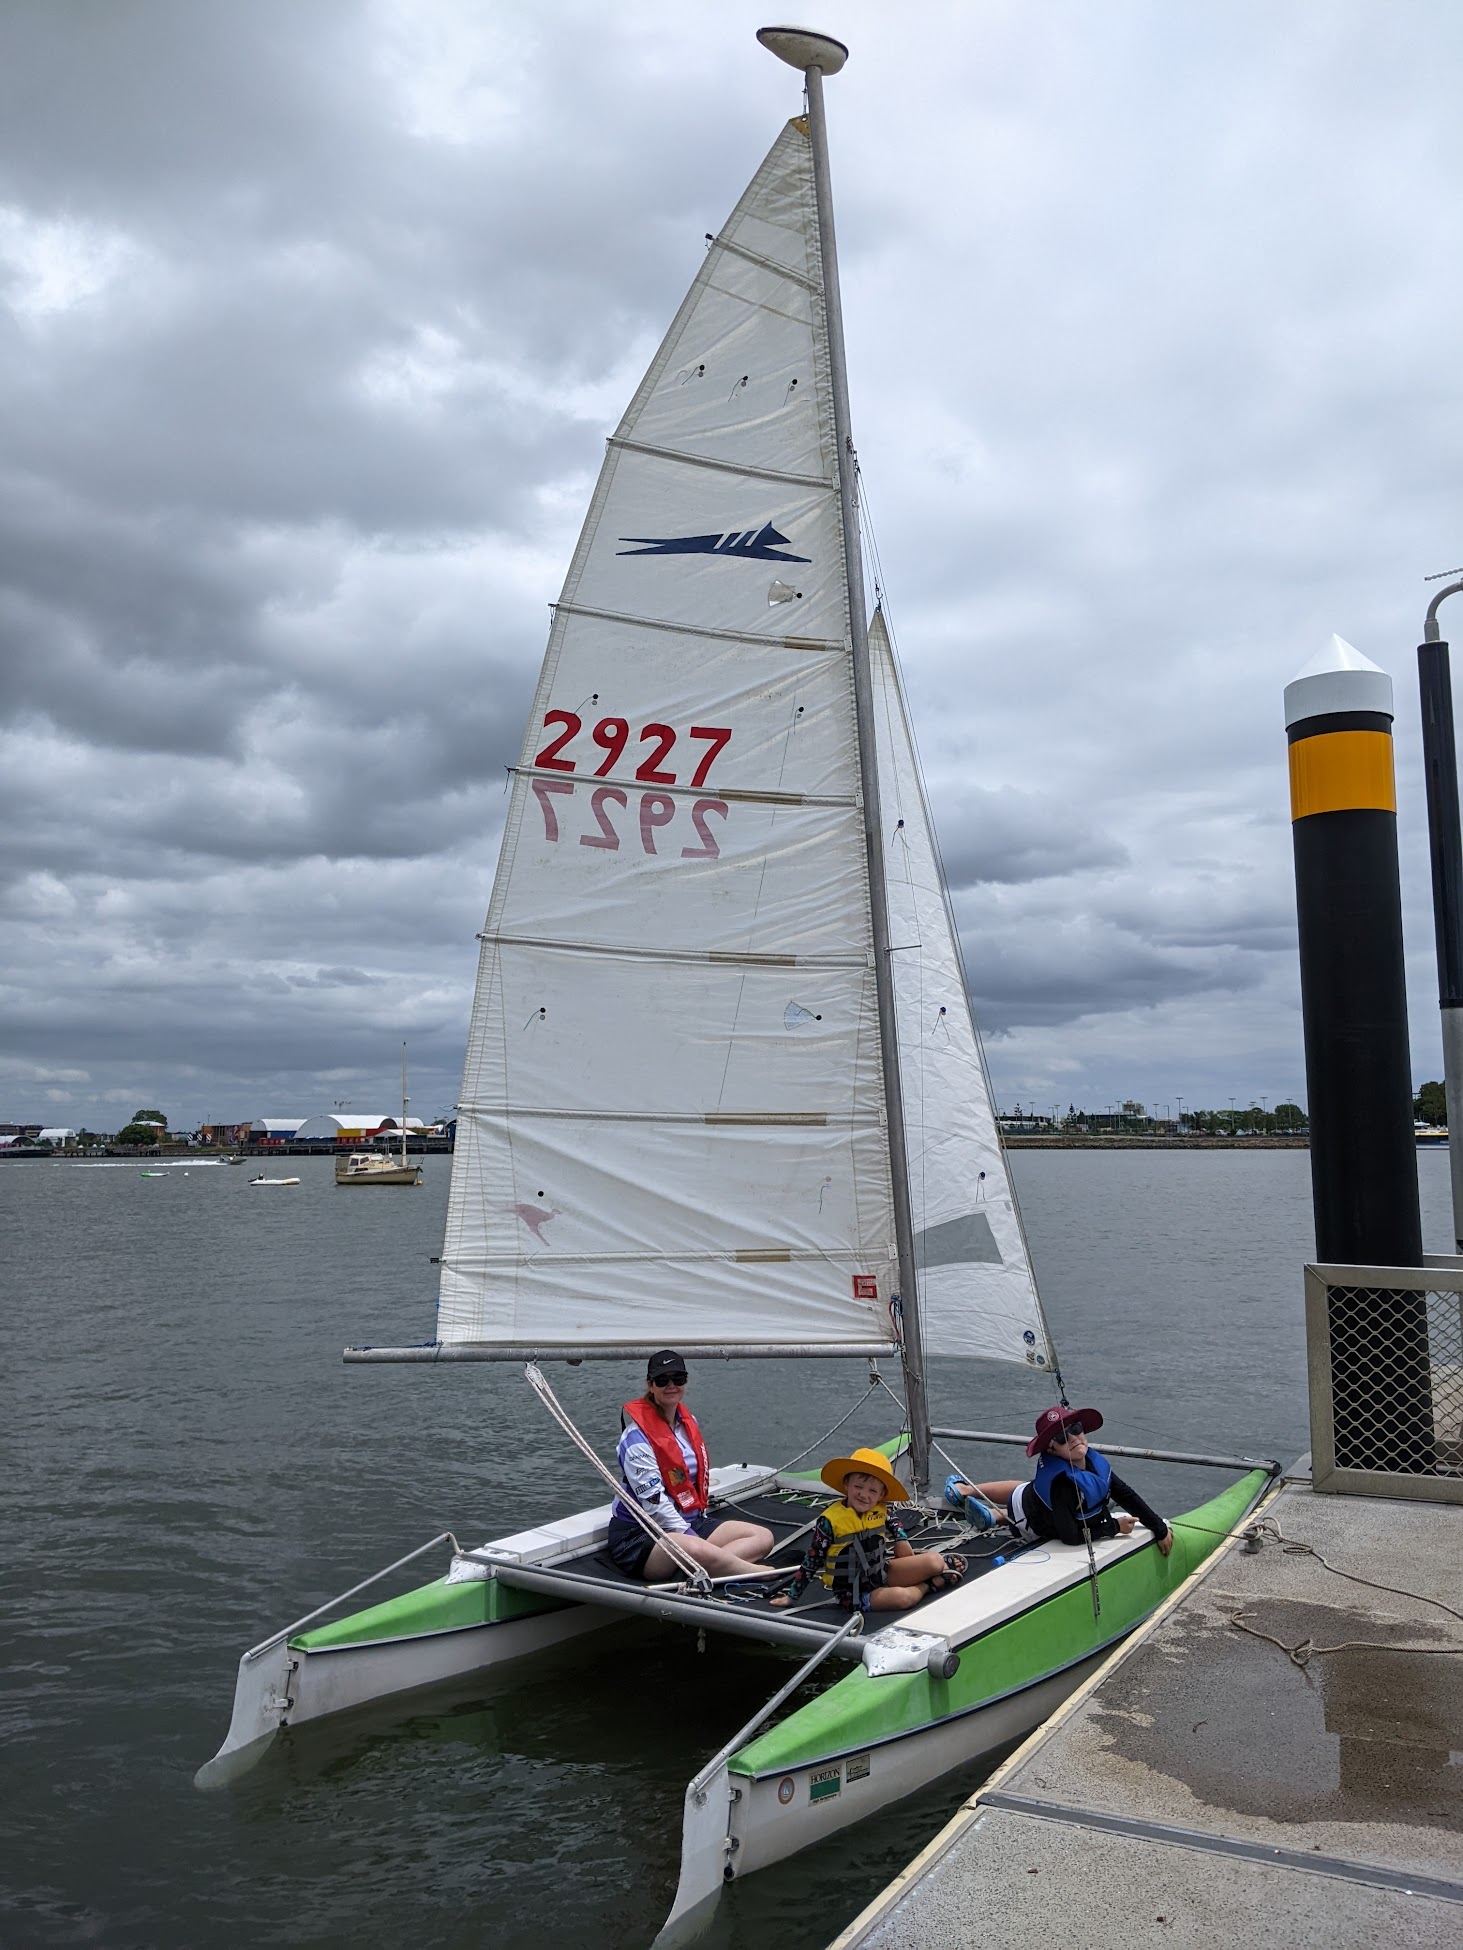
Our modest goal for the day was to get out on the water and make it about 1km downriver to the Colmslie Beach Reserve and back. We turned up bright and early, ribs aching, and stood the mast up in the parking lot. The boat and trailer combined are light enough for two adults to comfortably maneuver, even on a slippery ramp, so we unhooked from the car and wheeled it down to the water. We let it off the trailer and tied off to a cleat at the end of the dock. I got the sail situation sorted while Michelle hauled the trailer back to the car.
This was the first time I'd actually fully rigged this boat. The family patiently waited while I remembered the difference between a halyard and a cunningham and got the sails up in one fashion or another. Meanwhile, a kind gent living on a boat in the river gave us his phone number in case we needed a tow back to the dock. I am sure this was mostly due to the innate mutual respect shared between all humankind, but also partially due to me repeatedly failing to fasten the jib halyard into a clearly ineffectual cleat. I eventually tied it off to a random loop on the mast and hoped for the best. Then we all got our life jackets on, clambered aboard and cast off into the wide-ish brown wonder of the industrial end of the Brisbane river. All told we were underway in about 40 minutes. Not great, not terrible.
It was fucking fantastic. The wind was perfect, there was little traffic, and the kids were excitedly gabbling about everything that hove into view. Whenever a motorboat went past we'd steer into the wake and bounce up and down, laughing at getting splashed. We tacked back and forth up towards the Gateway Sir Leo Hielscher Bridges and tied up to the jetty next to Brewdog Brisbane for a breather and a stretch. My ribs were emphatically informing me of an upcoming bill, payable in ibuprofen. We considered going into the pub for lunch, but we didn't feel our attire was restaurant-compatible.
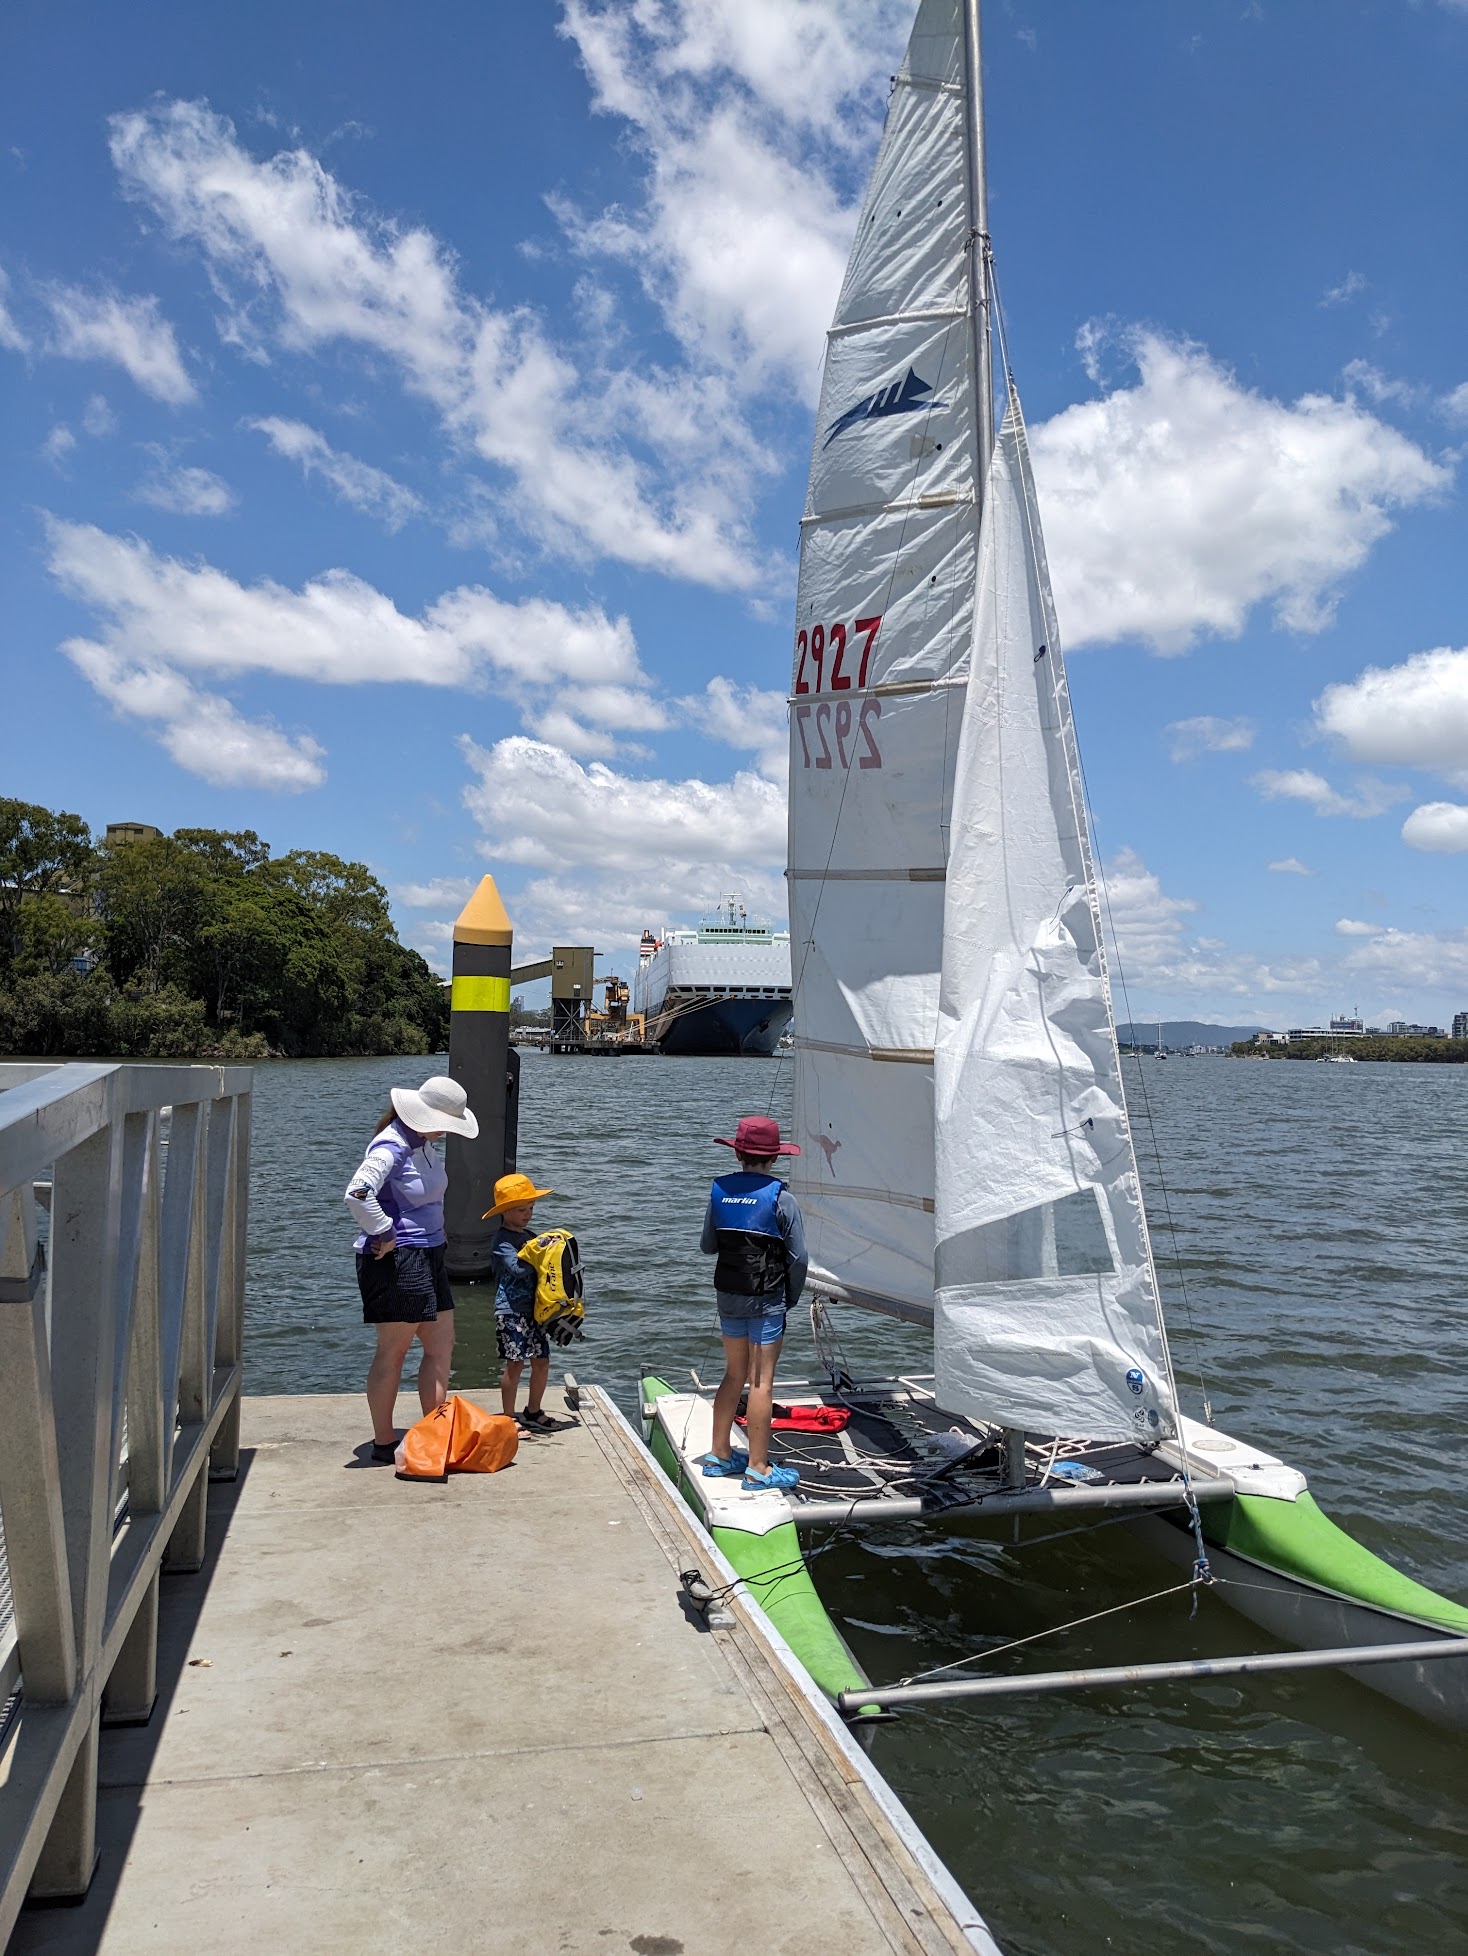
We made a straight run downwind back to the boat ramp. As we passed the incomprehensibly massive car carrier in the photo above the crew shouted out a merry Christmas from their deck 30m above the waterline. We caught the jetty and disembarked without incident. I dropped the sails (into the water, erk) and we got the boat back onto the trailer easily. In the car park I took out the bungs and we tilted the boat up. About five litres of water poured out of the left port pontoon. This was only mildly alarming. It wasn't enough to meaningfully affect the boat during short sails, but it would need to be addressed if we were to go on longer trips.
In summary: Fantastic success. We did not hit anything or sink much, we learned about our boat and how to make it go, and meet some nice people while out and about. The kids loved it and Michelle was enthusiastic about another outing soon.
Repairs
When we got home and cleaned up I thought I'd try to find the leak in the left pontoon. I wrapped a thick bundle of gaffer tape around the end of a compressed air gun and wedged it in the bunghole with a cable tie providing a gentle trickle of compressed air. I then sprayed soapy water all over the boat looking for bubbles from escaping air. The bottom-most bit (keel) on caper cats has an aluminium strip riveted along the length to protect it during beaching. I'd previously repaired the leading edge of the one that had come slightly loose on the other side, so I figured there might be some water getting in through a small hole there. I was wrong. Everything seemed airtight except for the top front bit where the top and bottom fibreglass halves were held together by an aluminium casting.
I was confused; only a little bit of water splashed over the front during our outing, when driving through wake from other boats. Finding no other leaks I took off the casting, prised the fibreglass apart a little bit and blorked in some construction adhesive and clamped it overnight. I then followed up with a liberal quantity of “roof and gutter” silicone I had leftover from fixing a roof and/or gutter. I reinstalled the casting and congratulated myself for completing my first moderately serious boat repair. Ominous undertones intended.
Financial stuff
The “Bring Out Another Thousand” acronym is a well worn warning about the hidden costs of owning a boat. There's always something to improve or fix, so it's easy to spend more than you expect or intend. Our caper cat was in good nick when we bought it, but there were a few things that needed to be done before we could take her out.
I've categorised our boat-related spending into “Fixed to boat” and “Not”. The former (nominally) contribute to the value of the boat and would go away if we sold it. The latter is stuff we'd keep after selling the boat and could re-use if we bought another boat. This categorisation has no real effect but grants me a feeling of control over the process.
New Jib
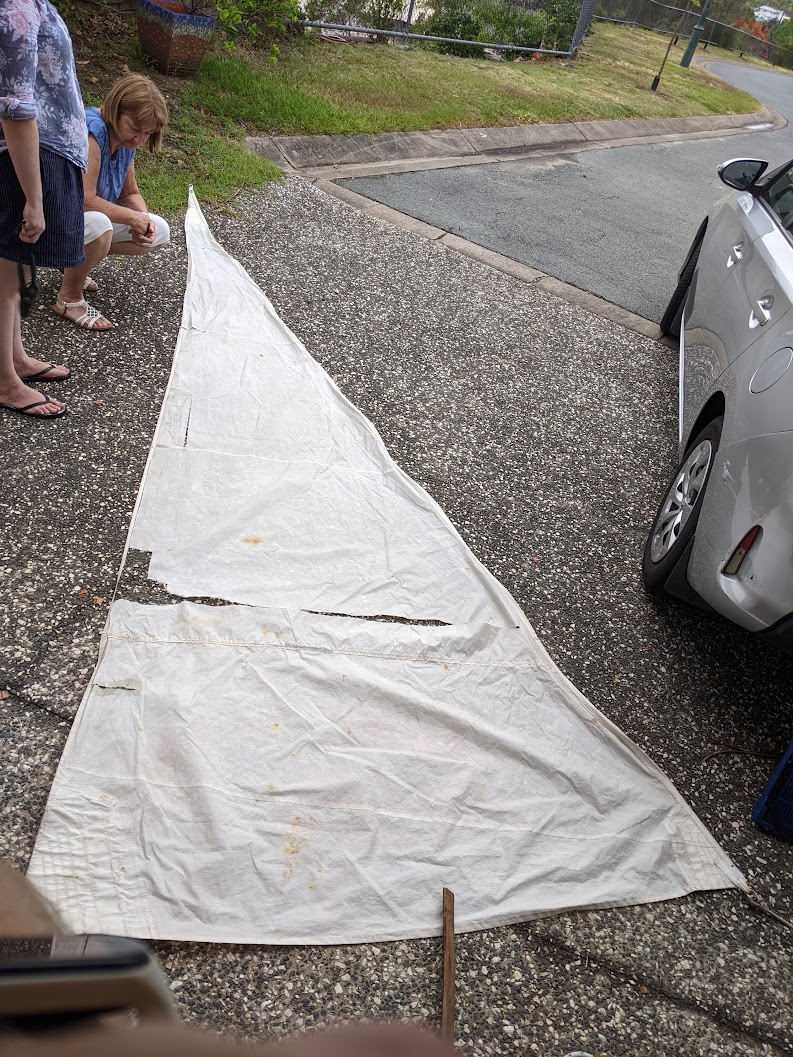
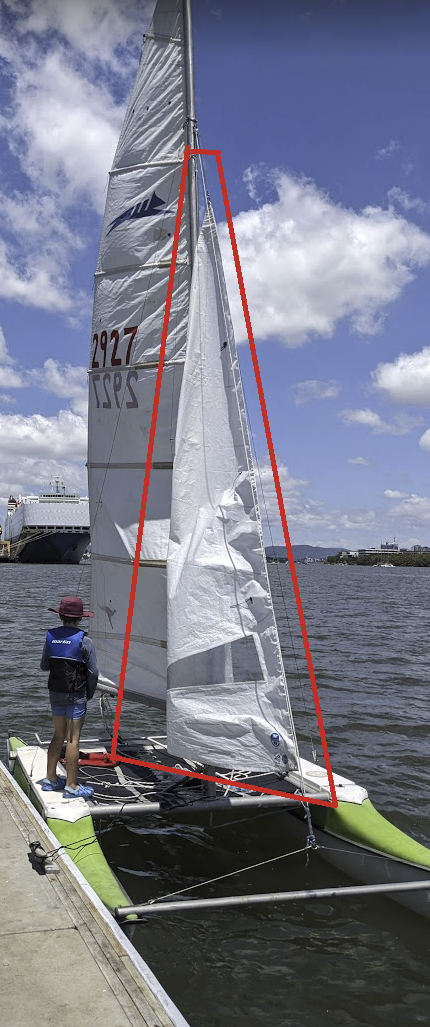
At the top of the list was the jib. That's the front sail. The original jib was a total wreck. Technically we could sail without a jib but we'd be losing a lot of sail area and we'd have to waste a lot of energy steering with the rudder. The jib and mainsail act to balance each-other to keep the boat going in a straight line. Without the jib we'd need to correct our direction with the rudder constantly, spending our precious wind power to generate turbulent water in our wake. No bueno.
Caper Cats aren't made anymore, so we couldn't buy a replacement off the shelf. Having sails custom-made is expensive, like “more than we paid for the boat” expensive, so I measured some dimensions and found a roughly suitable second hand sail on Sail Exchange. This website lets you search by the various edge lengths, price and quality to find something suitable. The replacement was AUD$200 delivered and arrived in a few days. It was rated 5/10 on the quality scale, but it was in far better condition than any sail I've ever seen.
Our sailing instructor told us that hardcore racing sailors sell their old sails after one or two seasons of sailing. A clapped-out racing sail still makes for an awesome casual pootling sail. I'm not sure if that's where ours came from, but I'm happy with it.
Rigging
Tiresome pedants love to say that sailboats have no ropes, but it's reasonable to ignore them and enjoy a better life as a result. There are ropes everywhere and they all have weird names that predate modern English. Some of these ropes are made of steel. These are collectively called “fixed rigging” and generally don't move much when sailing. These are in contrast to the “running rigging”, which are the ropes you pull on to make the boat go places or stop going places.
I had to install a new luff line along the leading edge of the new jib, and one of the mast shrouds had worn down to a few strands on one end. The shrouds are steel lines that run down the outside of the mast to add stiffness. If a shroud snapped the mast would wonk over sideways like a banana. This is bad for sailing. For this work I would need to pick up a spool of stainless wire, some thimbles, some swages, some shackles, carabiners and a swaging tool. Farewell to another AUD$200-ish.
“Swaging” is a fancy word for “squashing a thick metal tube around a wire”. It's a good way of making a strong join in braided wire. A thimble is an insert that goes inside a loop of wire to enforce a minimum bend radius. The old shroud was close to failure because the thimble was absent; the cable was fatigued by the sharp bend.
 Image source This is not a photo from our boat.
Safety Gear
Life Jackets
We got regular life jackets for the kids, and fancy pull-a-rope-to-inflate life jackets for the adults. They aren't too expensive when you consider what they do. We were looking at them at the shops and Sam (5) asked “This one daddy?” and yanked the inflation cord of a hanging life jacket. Fortunately it just fell off the hook rather than inflating. Kids are great. We got three life jackets for AUD$170 due to a scanning error we didn't notice until we got home. Bonus!
Radio
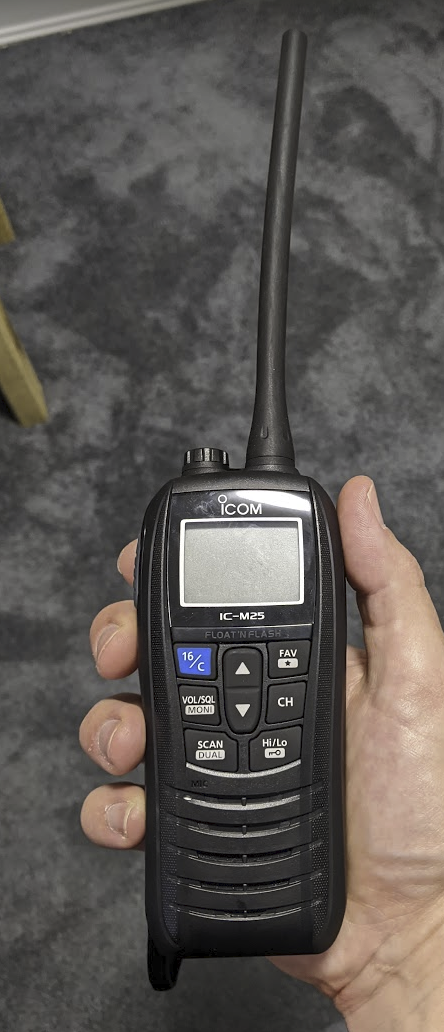
A marine VHF radio is an important piece of safety gear. If you're heading out into open water you can use it to call in to the Volunteer Marine Rescue folk and let them know the number of people onboard, where you're going and when you expect to be back. This means they can send someone to fish you out if you go missing. It's also handy for calling for help if you need it. I asked a radio nerd mate of mine (thanks VK4BRY!) for some advice. He recommended an ICom radio with at least 5W transmit power. I searched around and found a good price for an ICOM IC-M25 on ebay.
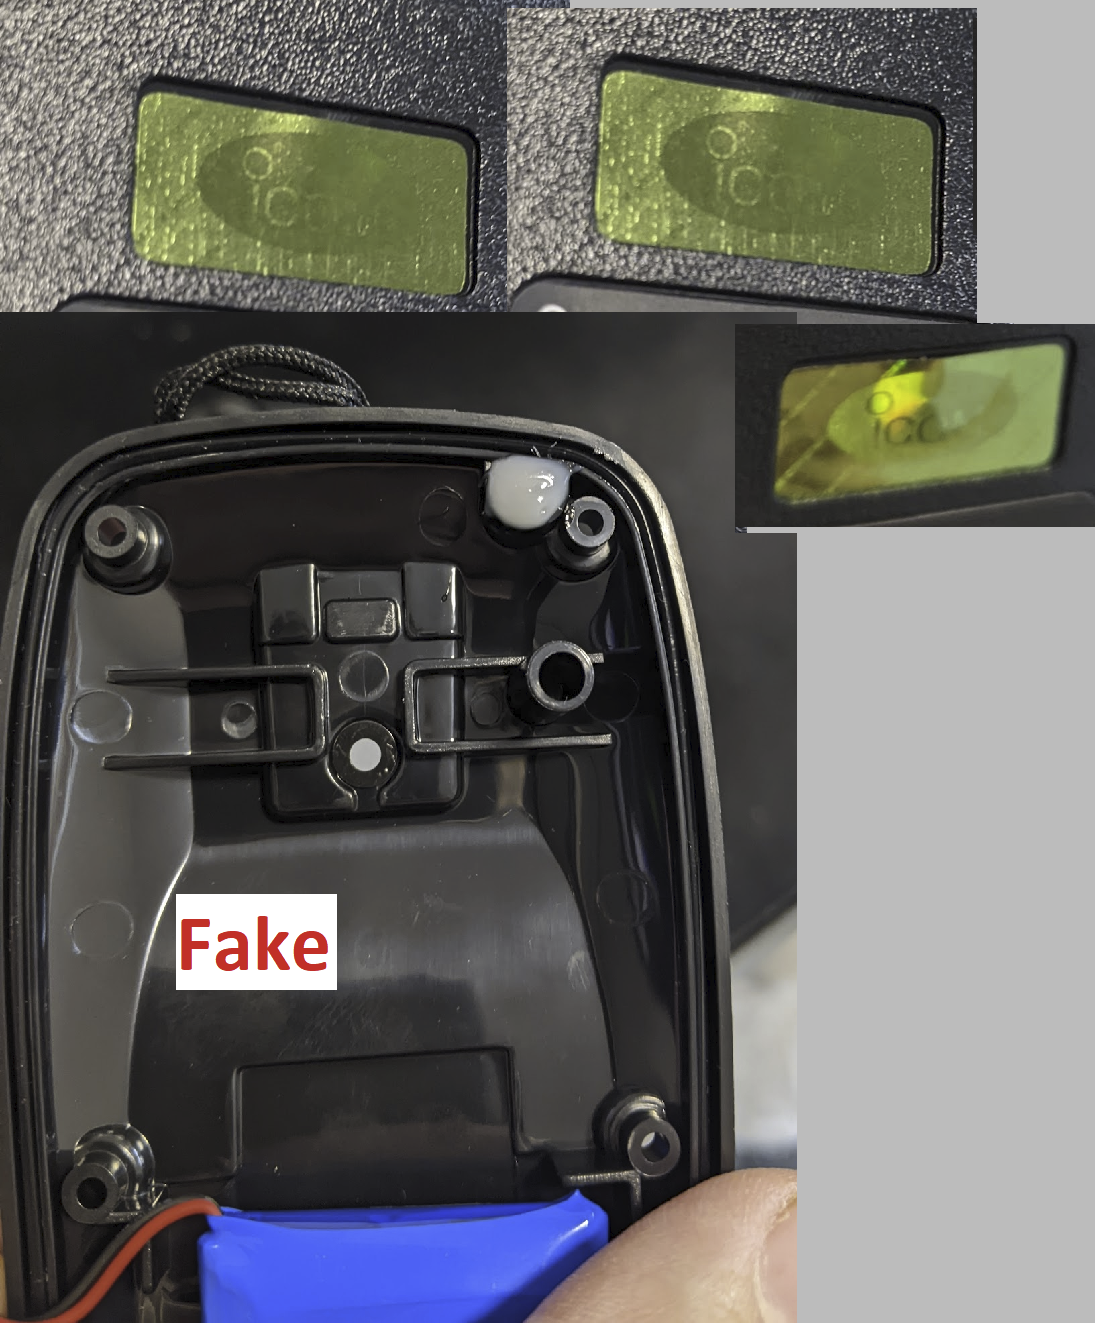
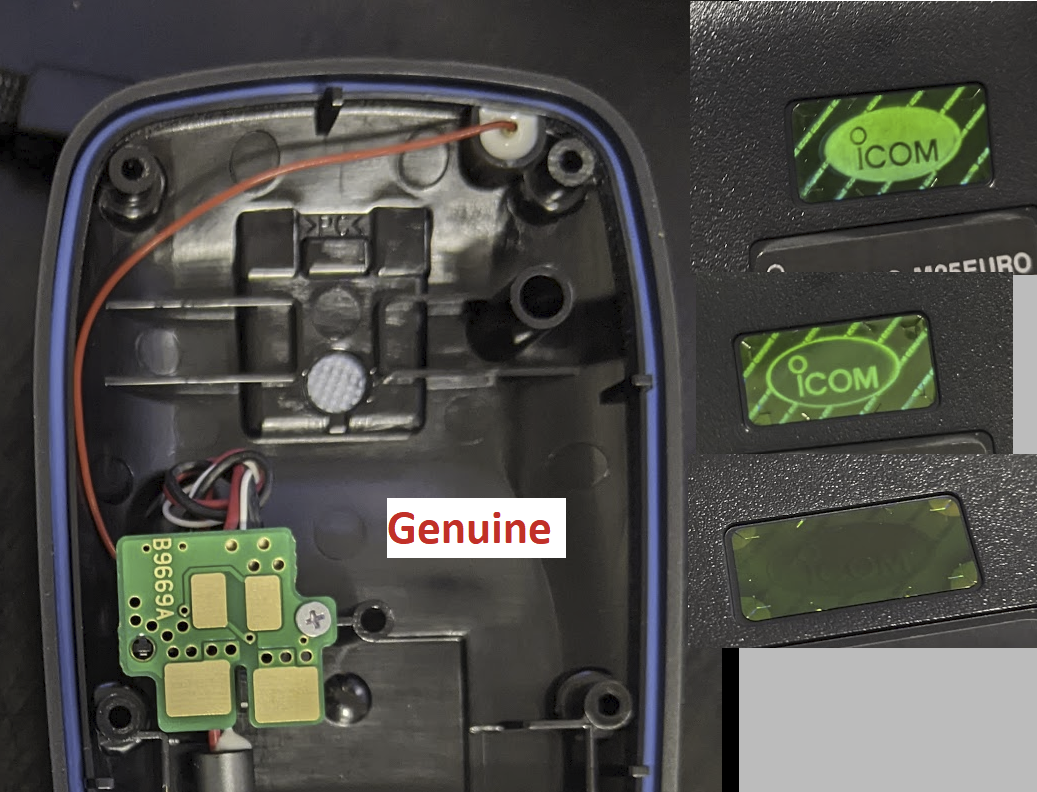
I had a play with the radio when it arrived. It worked fine, but the holographic sticker on the back didn't match the description on ICom's website. My suspicion piqued, I took the back housing off and found the immersion sensor pad wasn't connected to the rest of the radio. Hm. Hmmmmmm.
I requested a refund on ebay and posted it off. At time of writing I haven't received a refund. I ordered another radio from a more reputable storefront for a AUD$50 premium. I had some lingering doubts about my counterfeit assessment of the first one, but these were dispelled by the sticker on the new radio that exactly matched the description. And it had more wires inside, which is usually a good thing.
Charts
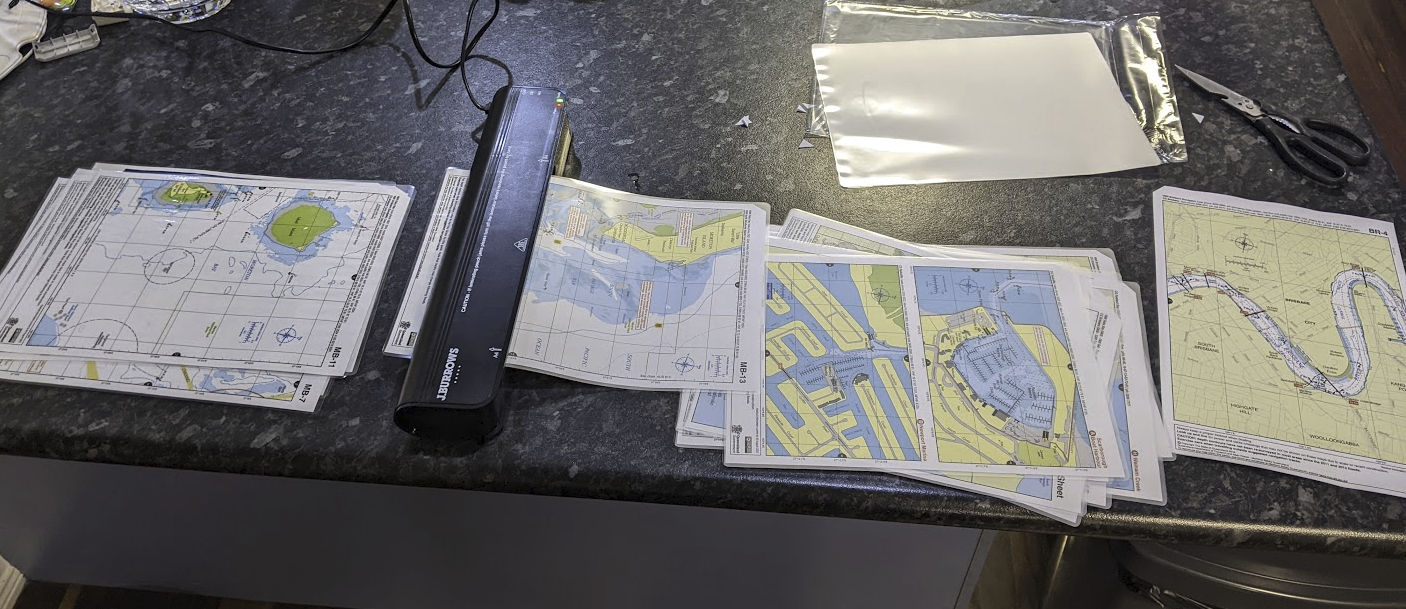
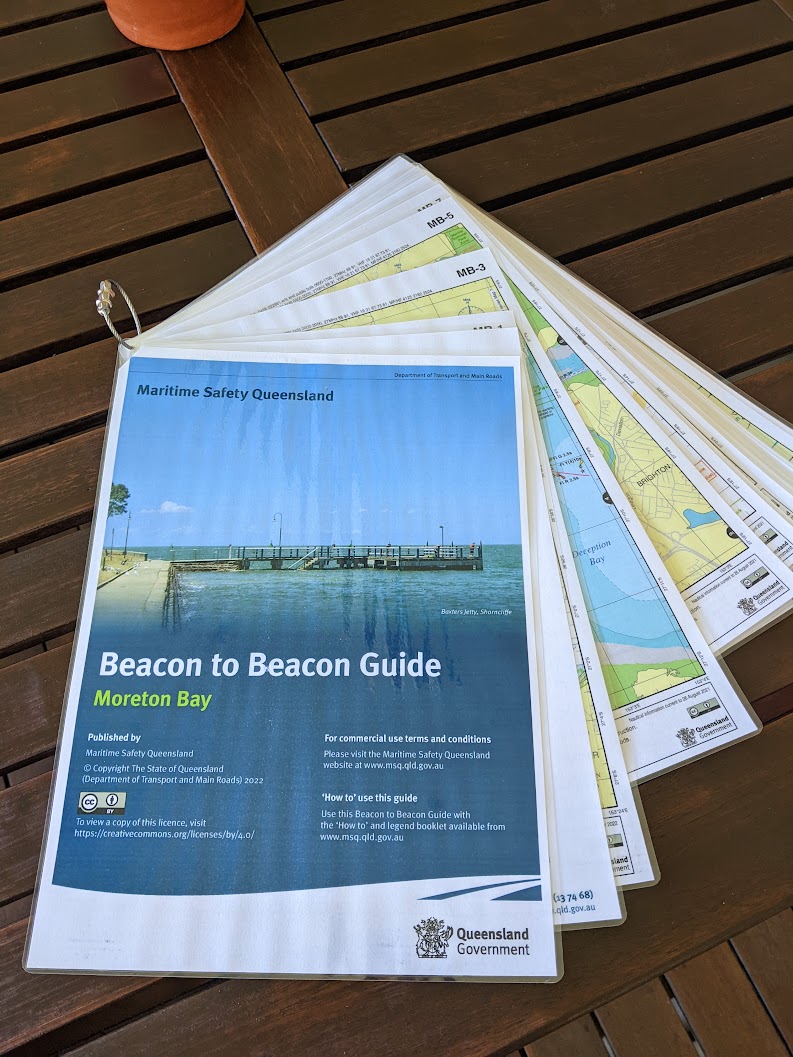
Charts (or maps) are important for telling you where things are. You, navigation markers, no-go zones, areas with special rules, boat ramps, water, land, things like that. They also usually show the depth of the water at low tide so you can avoid running aground. This is less of a concern for us because our boat is designed to run aground for fun, but it's a bigger deal for keelboats (boats that poke deep into the water). There are good charting apps for mobile phones, but as a software engineer I have an innate distrust of most software. I decided to go with paper charts. Maritime Safety Queensland publish an excellent set of charts, licensed under creative commons, that are designed to be printed A4. I printed them in double-sided colour at Officeworks and bought a pack of lamination pouches. Bon voyage, AUD$46.30.
I ended up cutting off the fetching swaged stainless wire loop and using a keyring instead. Works much better. I could've bought a pre-made book of charts, but it was slightly more expensive than making it myself, and included a bunch of charts I'd never need.
Everything Else
There were many other odds and sods for various things. The running total is up to AUD$2815.50. Oootch. I hope we use this boat lots.
| Date | Item | Source | Price | Postage | Fixed to boat | Note |
|---|---|---|---|---|---|---|
| 2023-12-16 | Boat | A guy | 1600 | 0 | Yes! | |
| 2023-12-17 | Bunnings | Bunnings | 80 | 0 | Tape, glue, fabric, shackles | |
| 2023-12-18 | Jib | SailExchange | 189 | 15 | Yes | Old jib shagged |
| 2023-12-19 | Radio Icom IC-M25 | Ebay | 180 | 0 | Safety | |
| 2023-12-20 | Tarp and straps | BCF | 156.97 | 0 | Cover boat | |
| 2023-12-20 | Life jackets | BCF | 169.97 | 0 | Charged us for two kid and one adult. | |
| 2023-12-20 | Trailer cable adapter | BCF | 36.99 | 0 | Rectangle to circle | |
| 2023-12-21 | Swages, swager, thimbles | Bunnings | 176.1 | 0 | Shroud repair | |
| 2023-12-21 | Sail repair tape | Ebay | 29.9 | 0 | Jib patch | |
| 2023-12-22 | Rope, shackles, thimbles | Bunnings | 38.8 | 0 | ||
| 2023-12-29 | Glue | Bunnings | 7.99 | 0 | ||
| 2023-12-27 | Charts | Officeworks | 46.3 | Printing and laminating | ||
| 2023-12-29 | Radio Icom IC-M25 | Whitworths | 229 | 32.53 | Other radio counterfeit | |
| 2023-12-29 | Jam cleat | Whitworths | 6.95 | 0 | Yes | |
| 2023-12-29 | Radio refund | Ebay | -180 | Not refunded yet. |

