What I want to accomplish
- Design the PCB
What I've done
Microcontroller
I went back and forth on this a few times. There were two main choices to make:
- ESP8266, or
- ESP32
and
- Breakout board, or
- Implement directly.
In my first software work log I essentially decided on the ESP32. The ESP8266 was a bit cheaper, but it really doesn't have much overhead for me to work with. If I wanted to stick with micropython, which I did for other reasons, I would need to go up to the ESP32. I selected the ESP-WROOM-32D specifically.
Breakout board vs bare.
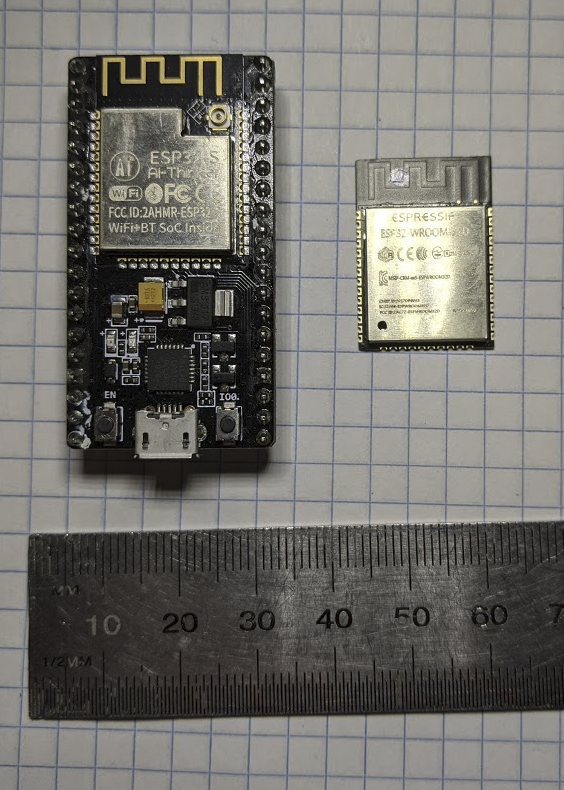
The next decision was around whether I wanted to design the PCB to accept a breakout board or the bare ESP-WROOM-32D package. The breakout board would be simpler, easier to solder, and provides a USB programming interface. The downside is that I couldn't find a consistently-available version of the board. Searching for “ESP32 breakout” or “ESP32 nodemcu” would yield a dozen slightly different boards. The Wemos D1 mini knockoff I was using earlier on in the project was more consistently knocked-off.
I'd hate for someone to be ordering the bits to build one of these robots and end up with a breakout board that didn't fit, or had the wrong pinout. The bare version is slightly cheaper too, so I decided to go with the bare ESP-WROOM-32D module. I had to implement some pull-ups and buttons to put it into a flashing state, but overall it wasn't too difficult and didn't add much to the BoM.
Stepper drivers
Stepper drivers take all the complicated nonsense out of driving a stepper motor and break it down to two signal pins: Step and direction. On a transition from 0v to 5v on the step pin the motor will turn one step in the direction specified by the direction pin.
Most stepper drivers on the market come in a 16-pin DIP package, originally defined by Pololu's very popular A4988 driver. New stepper drivers come out roughly pin compatible with the original layout so, in theory, you can upgrade easily.
| Driver | Cost | Microstepping | Silent | Note |
|---|---|---|---|---|
| A4988 | $ | 1/16 | No | Cheap and cheerful |
| DRV8825 | $$ | 1/32 | No | Fragile |
| TMC2100 | $$$ | 1/256?? | Potentially | Very fragile |
I originally tested with the A4988s, then upgraded to the DRV8825s for finer microstepping, then finally landed on the TMC2100s for their silent stepping capability.
A few times during writing the software I wished I had a way of changing the configuration on the stepper without meddling with my breadboard. Typically a row of jumper pins are positioned near the stepper driver footprint so the config pins can be pulled to 0v or 5v depending on what configuration is required. Typically only the degree of microstepping is exposed to the configuration interface. The TMC2100 has three tri-state pins, which can be either at 0v, VCC or somewhere in the middle. This gives us 27 possible configurations.
I routed the CFG pins to some spare outputs on the microcontroller so I can change the configuration at runtime. I had lots of spare pins available.
